
Coming from Fabricator 1
Both interfaces are in the same plugin. Fabricator 2 is what opens by default; the classic Fabricator 1 panel is one switch away. This page is for someone who knows Fabricator 1 and wants to find their way in Fabricator 2.
Switching
Section titled “Switching”Open Settings (the cog in the panel) → General → Fabricator version. The switch applies at once.
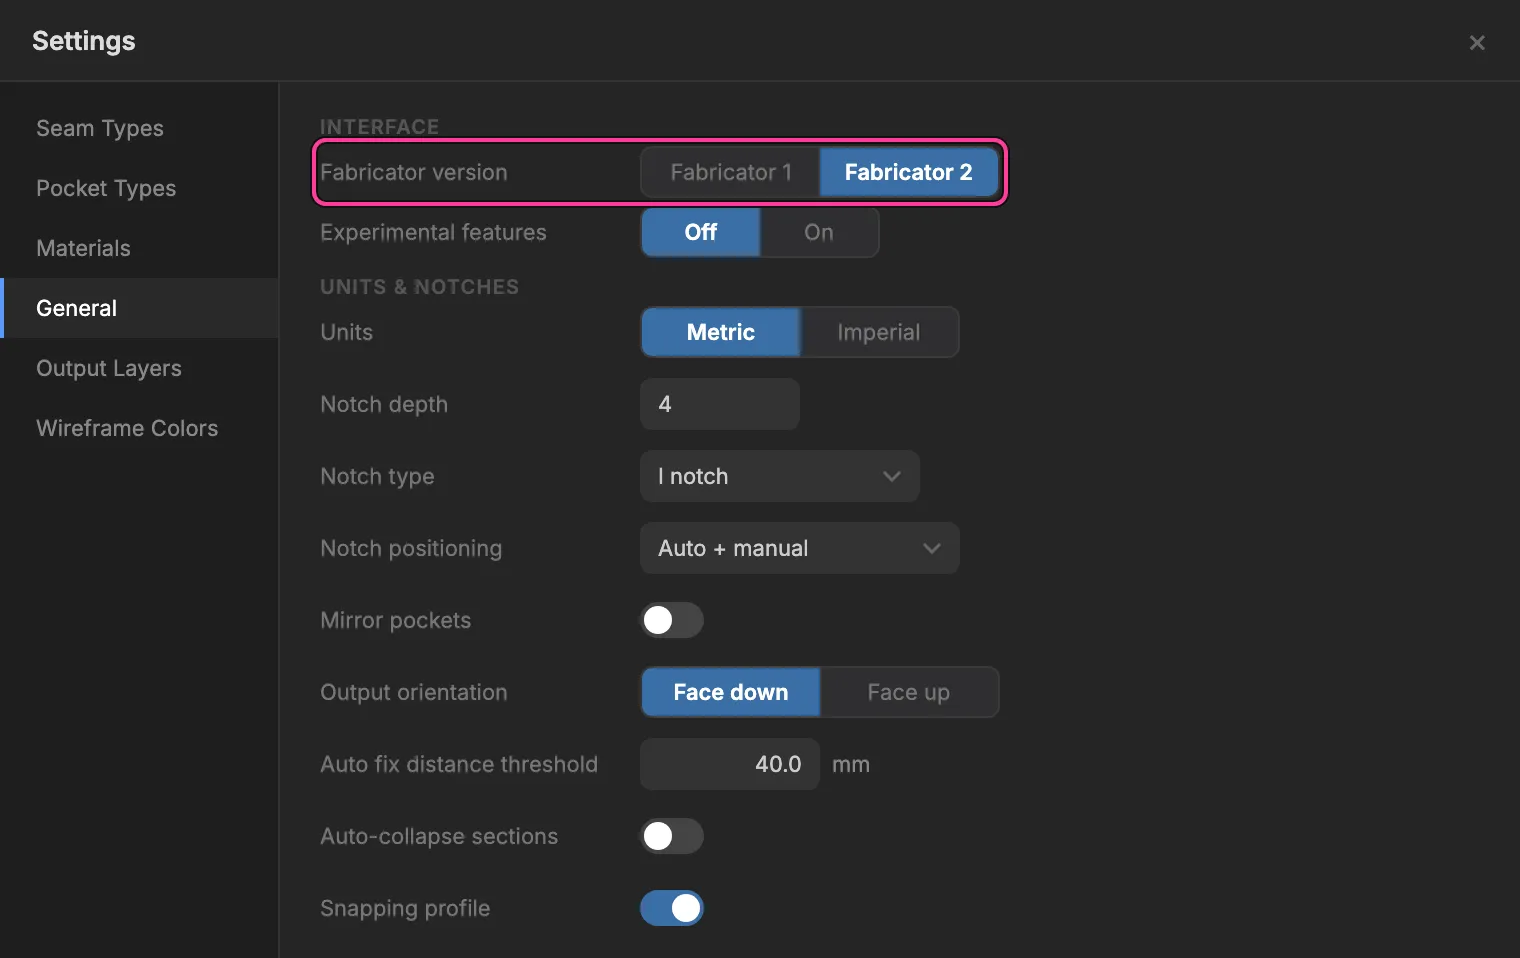
- Fabricator 1: the classic panel on its own, with its 2D Output section. The Atlas is hidden, and its chip with it.
- Fabricator 2: a shorter panel beside the Atlas.
Controls that Fabricator 2 hides keep their values, so switching back finds them as you left them.
The two panels side by side
Section titled “The two panels side by side”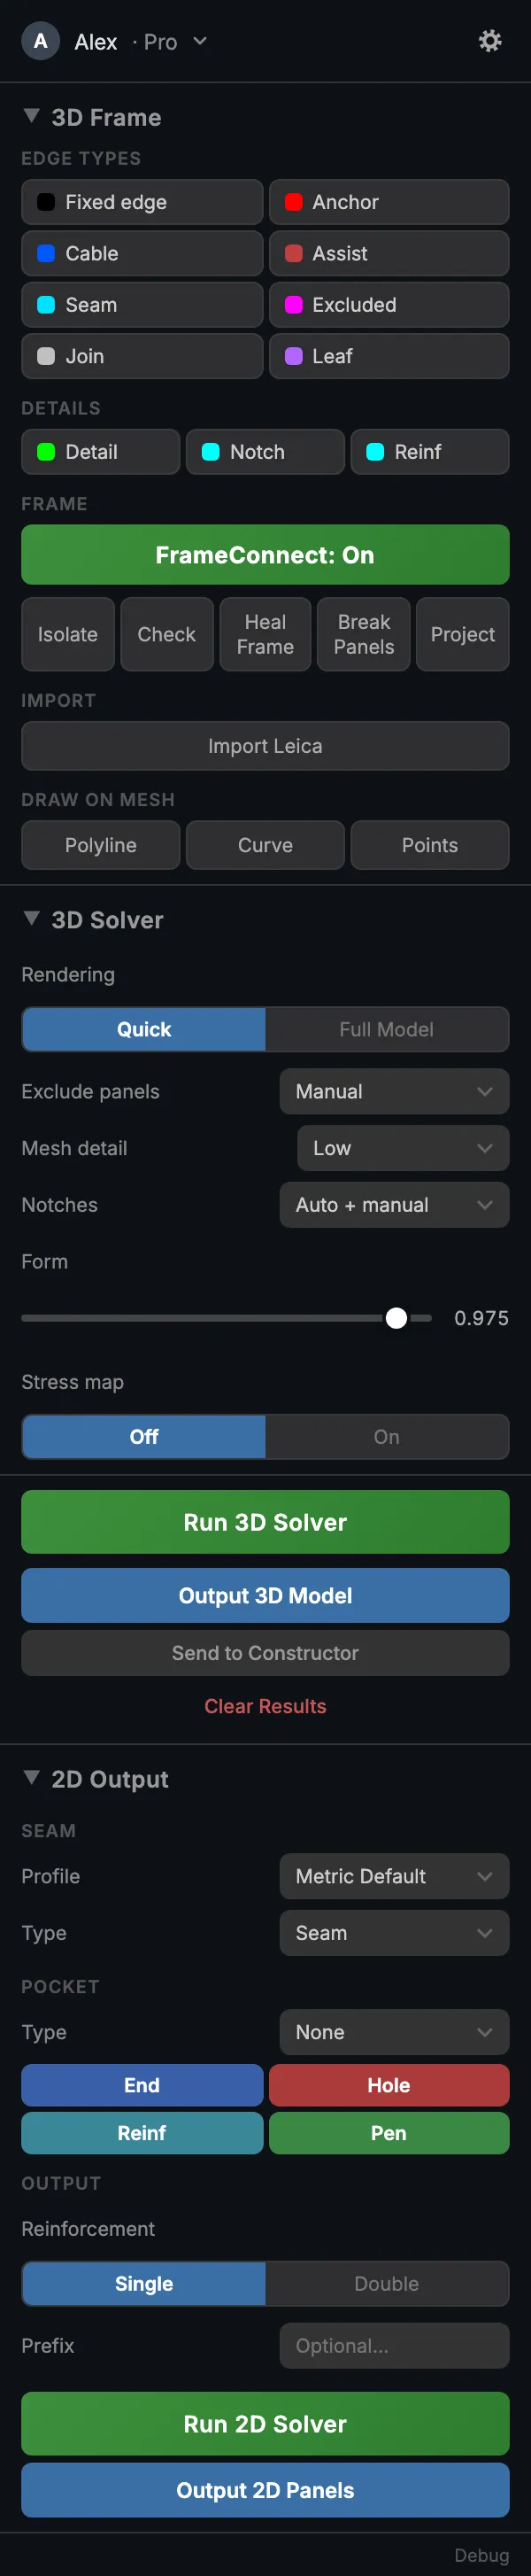
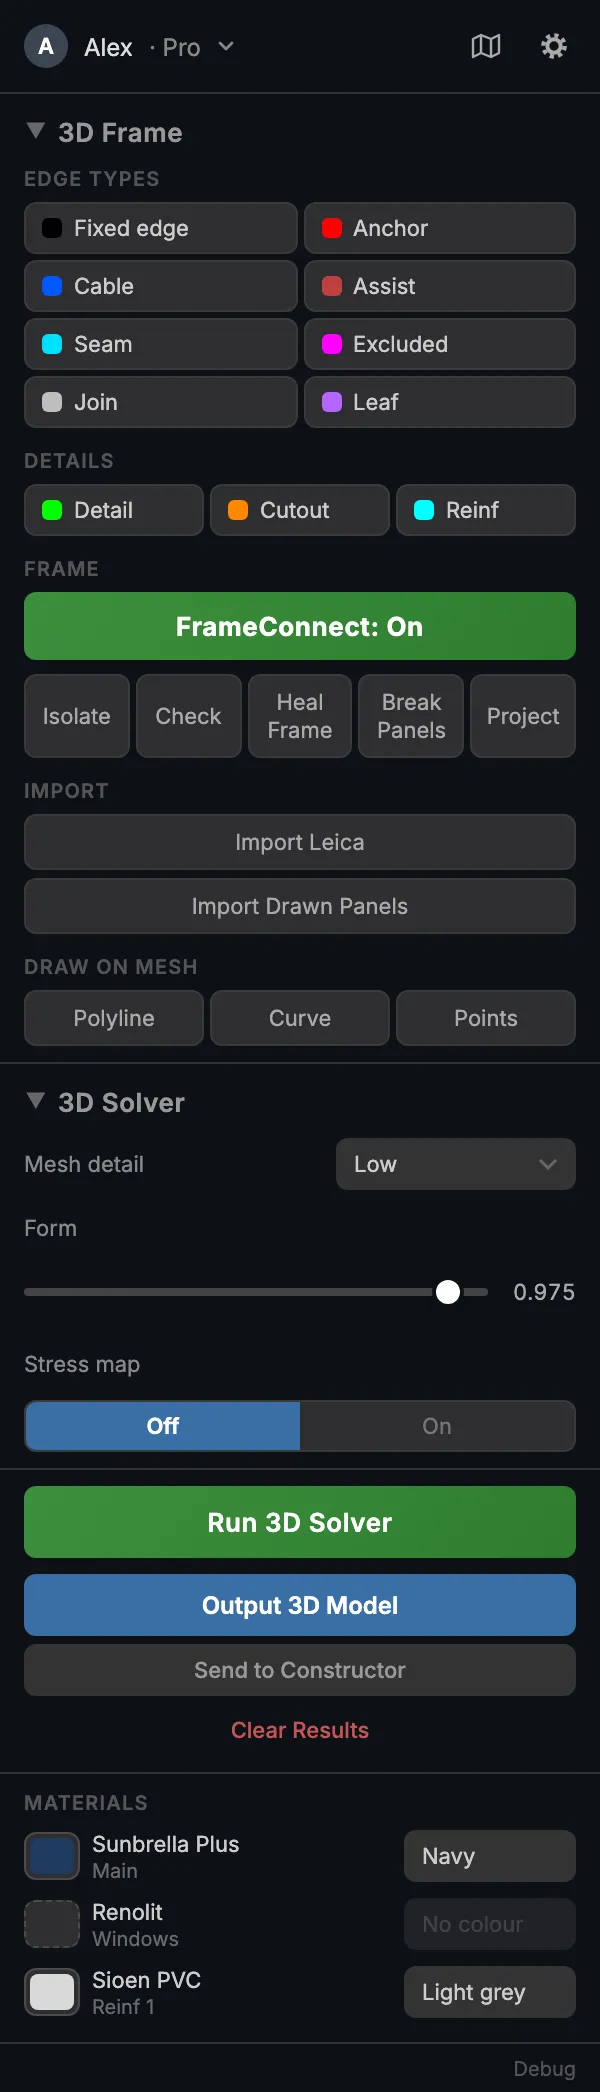
Fabricator 1 has 3D Frame, 3D Solver and 2D Output, all in one panel. Fabricator 2 has the same 3D Frame section, a shorter 3D Solver and the Materials list. Everything that was under 2D Output is now in the Atlas.
Gone from the Fabricator 2 panel: Rendering, Exclude panels, Notches and the whole 2D Output section. New in it: the Atlas button next to the cog, the Cutout chip (where Fabricator 1 has Notch), Import Drawn Panels and the Materials list.
Where did it go?
Section titled “Where did it go?”| In Fabricator 1 | In Fabricator 2 |
|---|---|
| Rendering: Quick / Full Model | No switch. The Atlas shows the panels as you draw, and Run 3D Solver is the one solve. Mesh detail sets its quality. |
| Run 3D Solver, Output 3D Model | Same names, in the panel and in the Atlas. They work on what is selected in the viewport. |
| Exclude panels | Cross out a loop that carries no fabric with an Excluded edge. |
| Notches: Auto + manual / Manual only, and the Notch chip | The Notch tool and the dens slider in the Atlas. Set dens to 0 for your own notches only. |
| 2D Output › Seam Profile and Type | The Seams tool in the Atlas. The profile is chosen at the top of its seam types list. |
| 2D Output › Pocket End, Hole, Reinf, Pen | The Pocket tool in the Atlas, with End and Hole marks in its menu, and the Reinf and Detail tools. |
| Reinforcement: Single / Double | The single / double button in the Atlas’s Output column. |
| Run 2D Solver | Not needed. The panels are flat in the Atlas all the time. |
| Output 2D Panels | Output 2D patterns, in the Atlas’s Output column. |
What is new
Section titled “What is new”- A live 2D view. Panels appear flat as you draw, before any solve.
- Materials. A material and a direction per piece, colours, suggested cuts for panels wider than the roll, and an estimate for quotes.
- Nesting. Built in, by material and colour.
- Working in 2D. Split and Join panels on the page; the wireframe follows. Cutouts, custom reinforcements, the Detail library, windows with their glass, and linked copies.
- The Leaf edge. A third panel on a shared edge.
- New ways in. Leica import, and Import Drawn Panels for panels patterned by hand or in other software.
Four habits to change
Section titled “Four habits to change”- Open the Atlas early. You no longer wait for a solve to see your panels.
- Set the material first. Suggested cuts and the nest depend on it.
- Assign seams on the flat panels, before or after the solve.
- Remember the wireframe is the master. A cut or a join in 2D changes the 3D curves.
A project, step by step walks through Fabricator 2 in the order you work.