
Settings
Open Settings with the cog at the top of the Fabricator panel, or the cog in the Atlas header. The panes are listed on the left.
There is no Save button: every change is saved at once, and × closes the window. Deleting a profile or a type asks you to confirm first.
Seam Types
Section titled “Seam Types”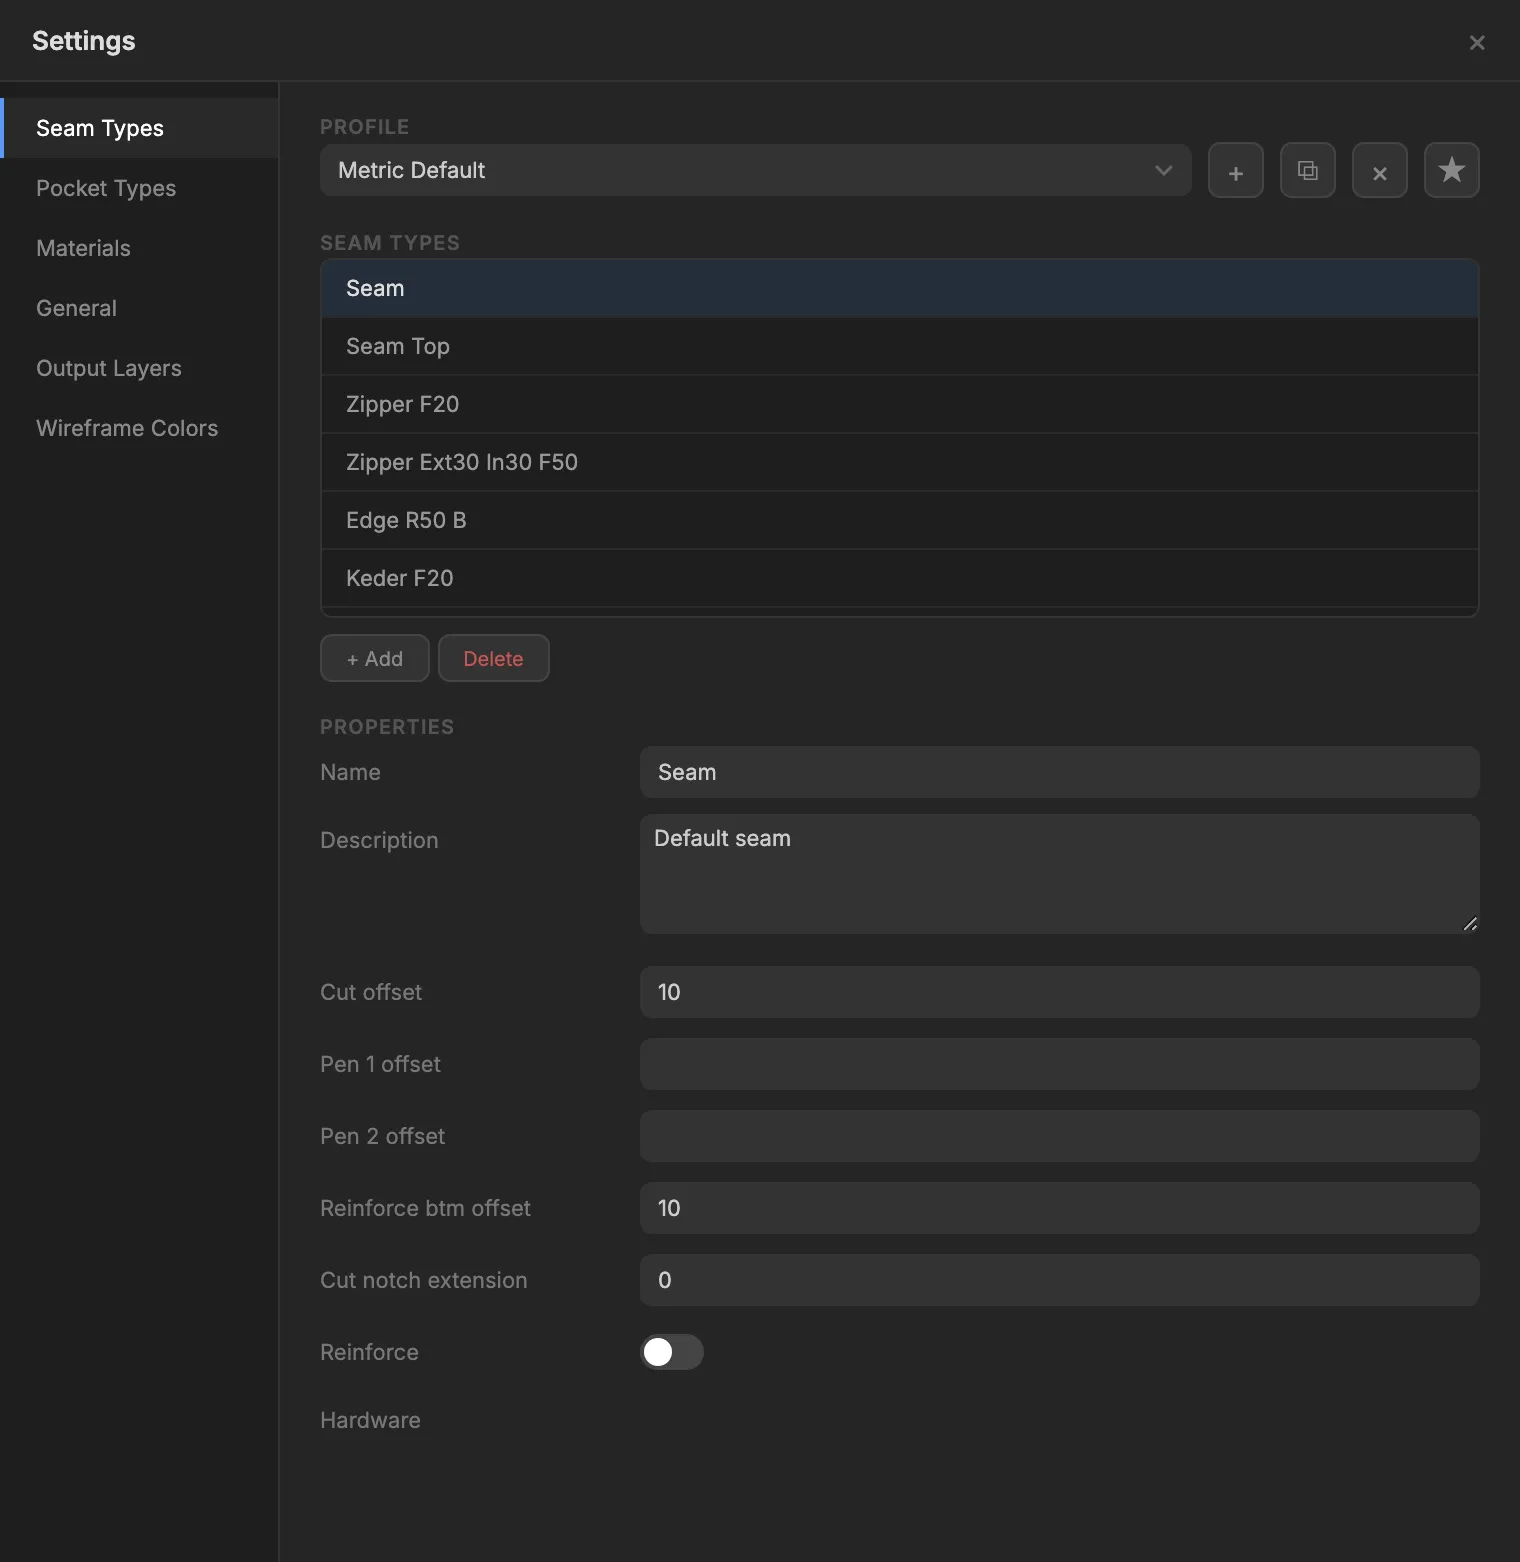
Your seam profiles and the seam types in each. A seam profile is a set of seam types and pocket types. Fabricator ships two, Metric Default and Imperial Default, and picks the one that matches the drawing’s units. They are kept on this computer. The Seam Profile Guide explains every setting with examples.
The list on the left holds the seam types of the profile. Click one and its values are under Properties on the right. The Pocket Types and Materials panes work the same way.
| Control | What it does |
|---|---|
| Profile | The profile in use. The buttons beside it: + new, ⧉ duplicate, × delete, ★ set as default. |
| Seam Types | The seam types of the profile. + Add adds one; Delete deletes the selected one. |
| Name | The name, as the Atlas lists it. |
| Description | A note shown with the seam type. |
| Cut offset | Where the material is cut, measured from the line you drew: the seam allowance. |
| Pen 1 offset | The main pen line on the piece, such as a fold line or a zipper position. Negative is inward. |
| Pen 2 offset | A second pen line. |
| Reinforce btm offset | How far this edge’s reinforcement reaches toward the finished edge. |
| Cut notch extension | How far the alignment notches reach. Almost always 0. |
| Reinforce | On: Fabricator makes a reinforcement piece for this edge. |
| Hardware | Hardware types to tag the seam with, when any exist. |
The default Seam of Metric Default has a cut offset of 10 and a reinforce btm offset of 10, with no pen lines and no reinforcement.
Pocket Types
Section titled “Pocket Types”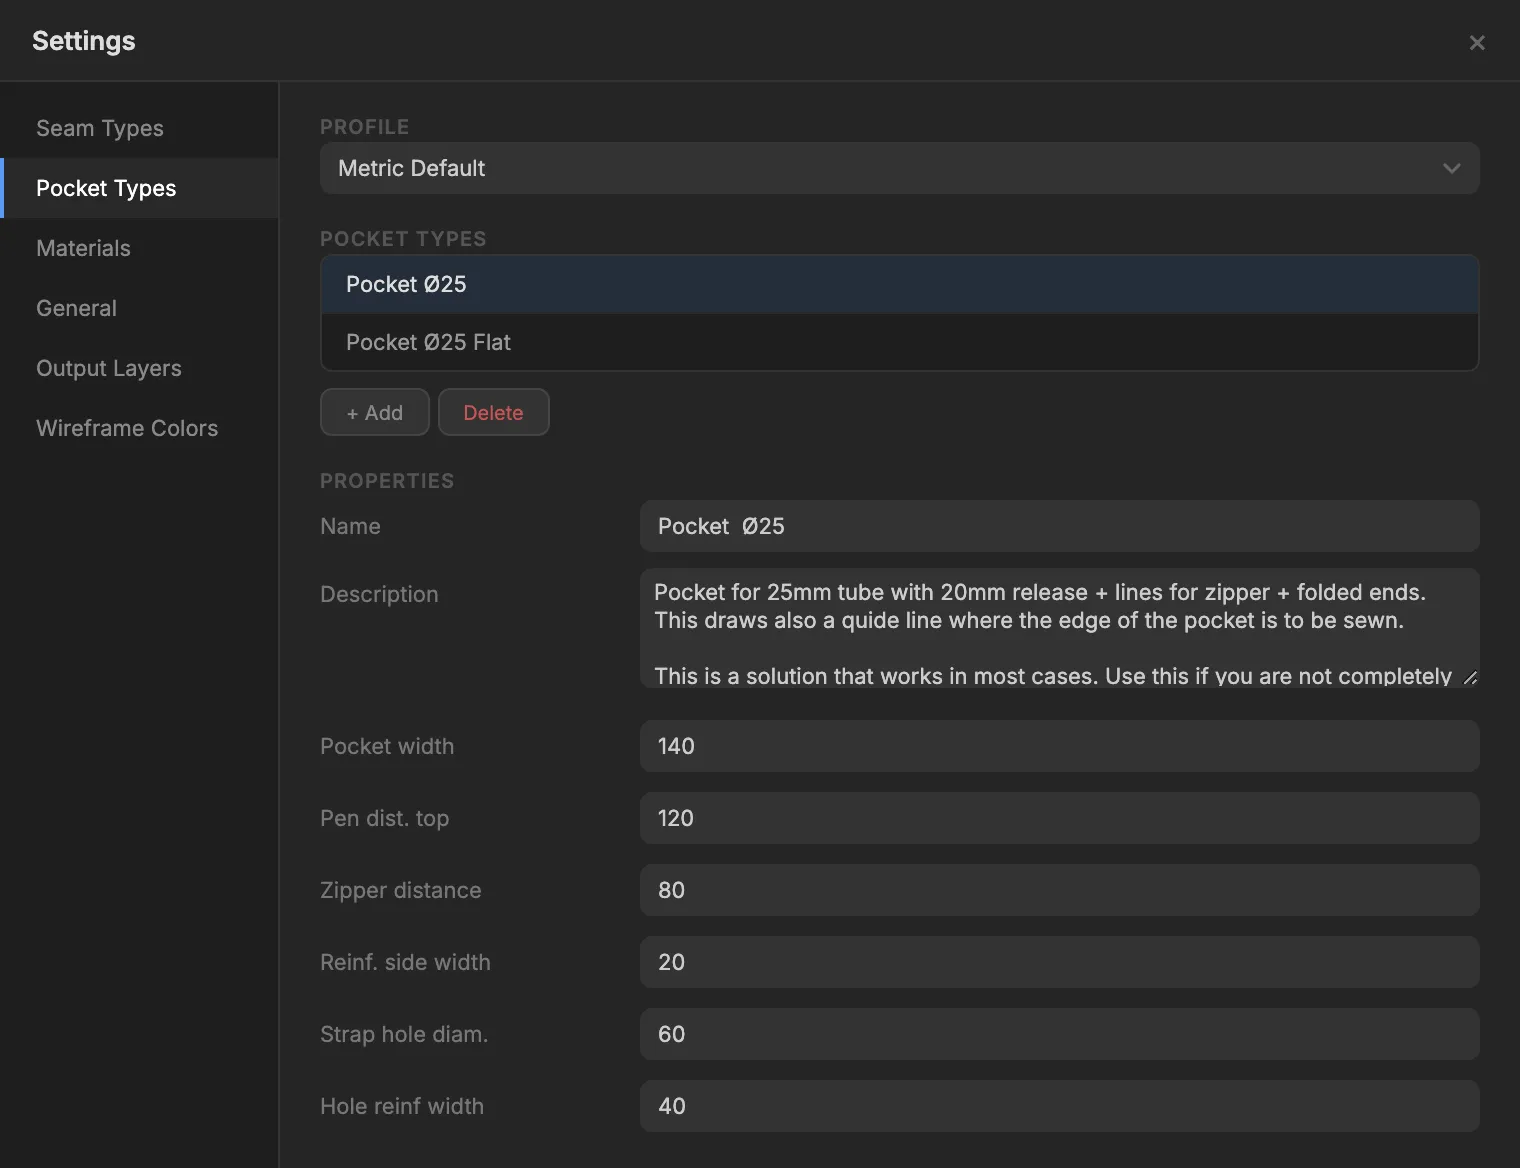
The zipper pocket types of the profile chosen under Profile. + Add and Delete as above.
| Field | Pocket Ø25 (shipped, metric) |
|---|---|
| Pocket width | 140 |
| Pen dist. top | 120 |
| Zipper distance | 80 |
| Reinf. side width | 20 |
| Strap hole diam. | 60 |
| Hole reinf width | 40 |
Each type also has a Name and a Description.
Materials
Section titled “Materials”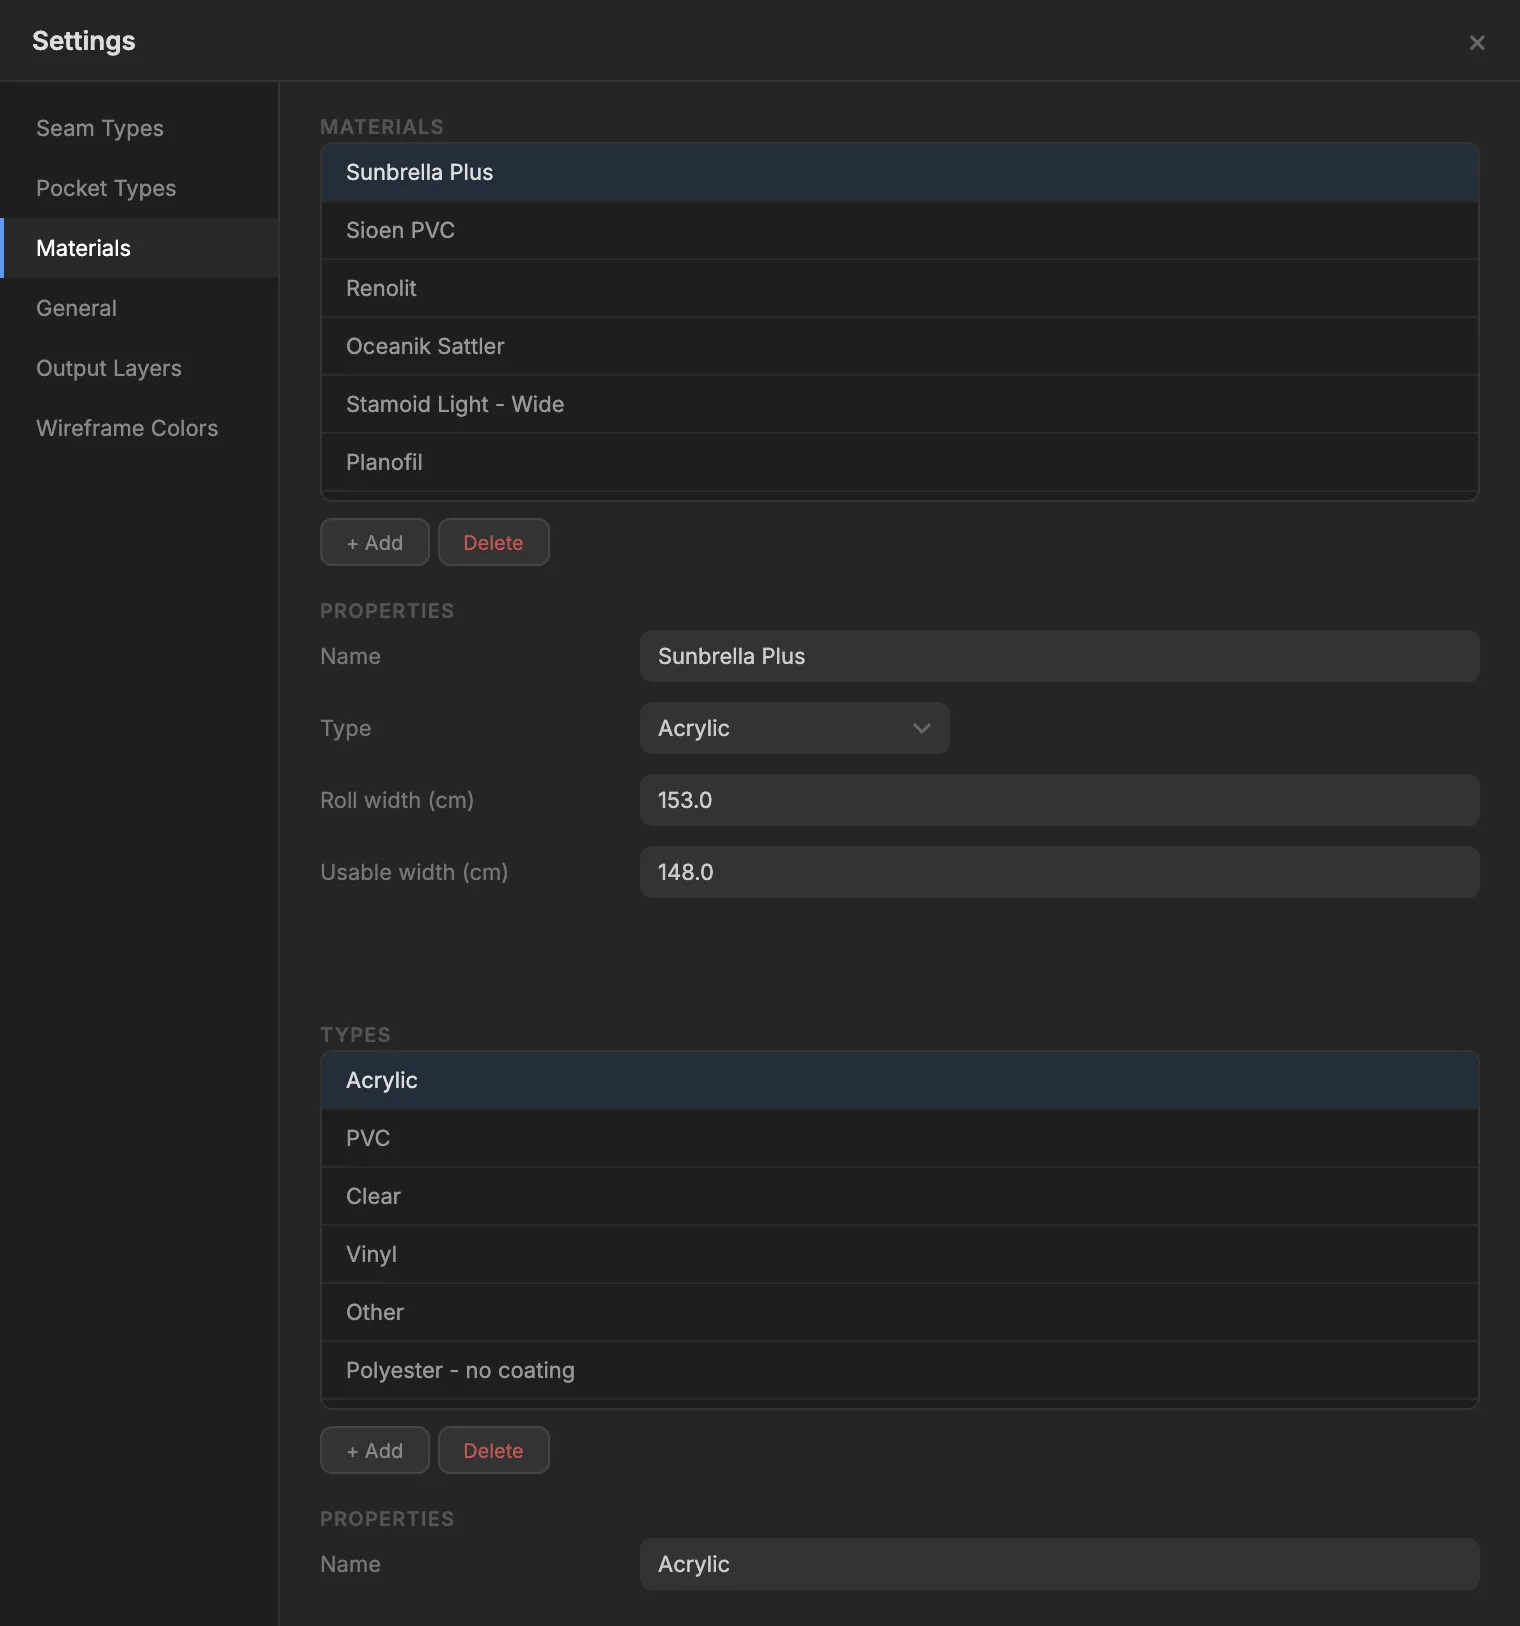
Your material library, on this computer. It is the list the Atlas’s material pickers show.
| Field | What it is |
|---|---|
| Name | The material’s name, up to 128 characters. |
| Type | Its material type, from the Types list below. |
| Roll width (cm) | The width of the roll. In inches when Units is Imperial. |
| Usable width (cm) | The width you can cut from, inside the selvedges. The nest and the suggested cuts use it. |
Types is the list of material types (Acrylic, PVC, Clear and so on), with + Add, Delete and a Name for each. The Atlas groups materials by type.
General
Section titled “General”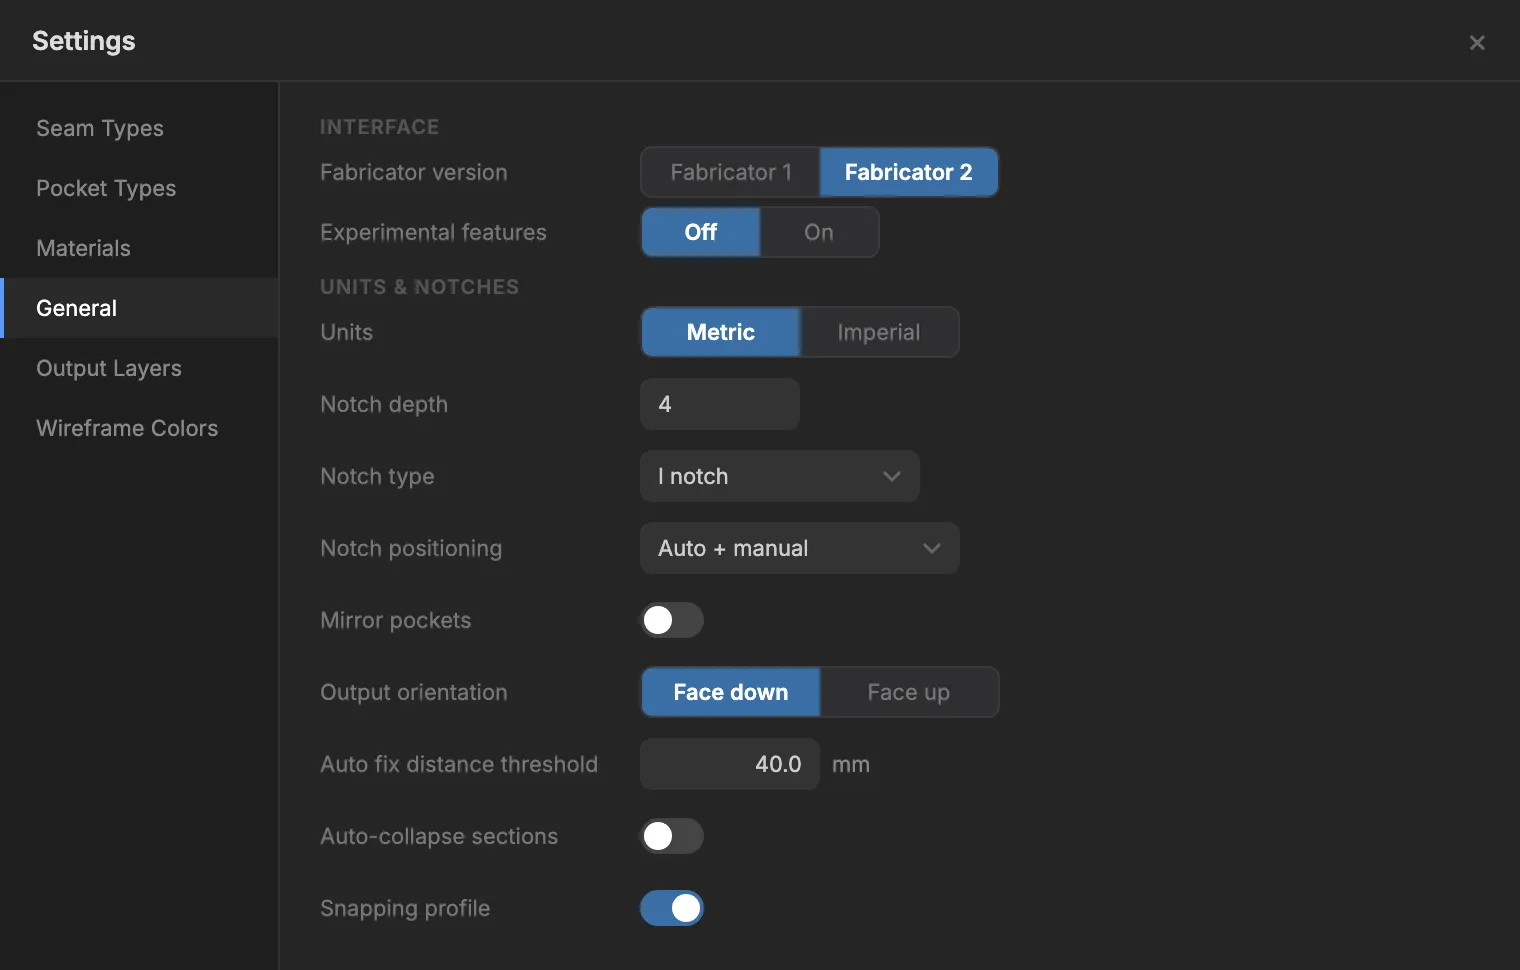
Interface
Section titled “Interface”| Setting | Default | What it does |
|---|---|---|
| Fabricator version | Fabricator 2 | Fabricator 1: the classic panel on its own, with its 2D Output section; the Atlas is hidden. Fabricator 2: the shorter panel beside the Atlas. The switch applies at once. See Coming from Fabricator 1. |
| Experimental features | Off | Shows tools that are still being worked on. Leave it off unless Fabricator support asks you to try one. |
Units & Notches
Section titled “Units & Notches”| Setting | Default | What it does |
|---|---|---|
| Units | Metric | Metric or Imperial. |
| Notch depth | 4 | How deep a notch is, in the drawing’s units. |
| Notch type | I notch | The shape of a notch: I notch, V notch or Point. |
| Notch positioning | Auto + manual | Fabricator 1 only: the starting value of the panel’s Notches setting. In Fabricator 2, the dens slider in the Atlas sets how many automatic notches there are. |
| Mirror pockets | Off | Fabricator 1 only. In Fabricator 2, use the mirror box beside the Pocket tool in the Atlas. |
| Output orientation | Face down | Which way round the geometry is drawn when you output it to Rhino: Face down or Face up. How the Atlas shows the panels is separate. Text is never mirrored. |
| Auto fix distance threshold | 40 mm (1.5 in) | How near two ends must be for Check to call it a near miss. 1 to 200. |
| Auto-collapse sections | Off | When you open one section of the Fabricator panel, the others close. |
| Snapping profile | On | Keeps Rhino’s object snaps ready for drawing a connected wireframe: snapping on, End, Point, Intersection, Midpoint and Vertex on, snap radius at least 20 px. It only adds to your settings, never removes. |
Output Layers
Section titled “Output Layers”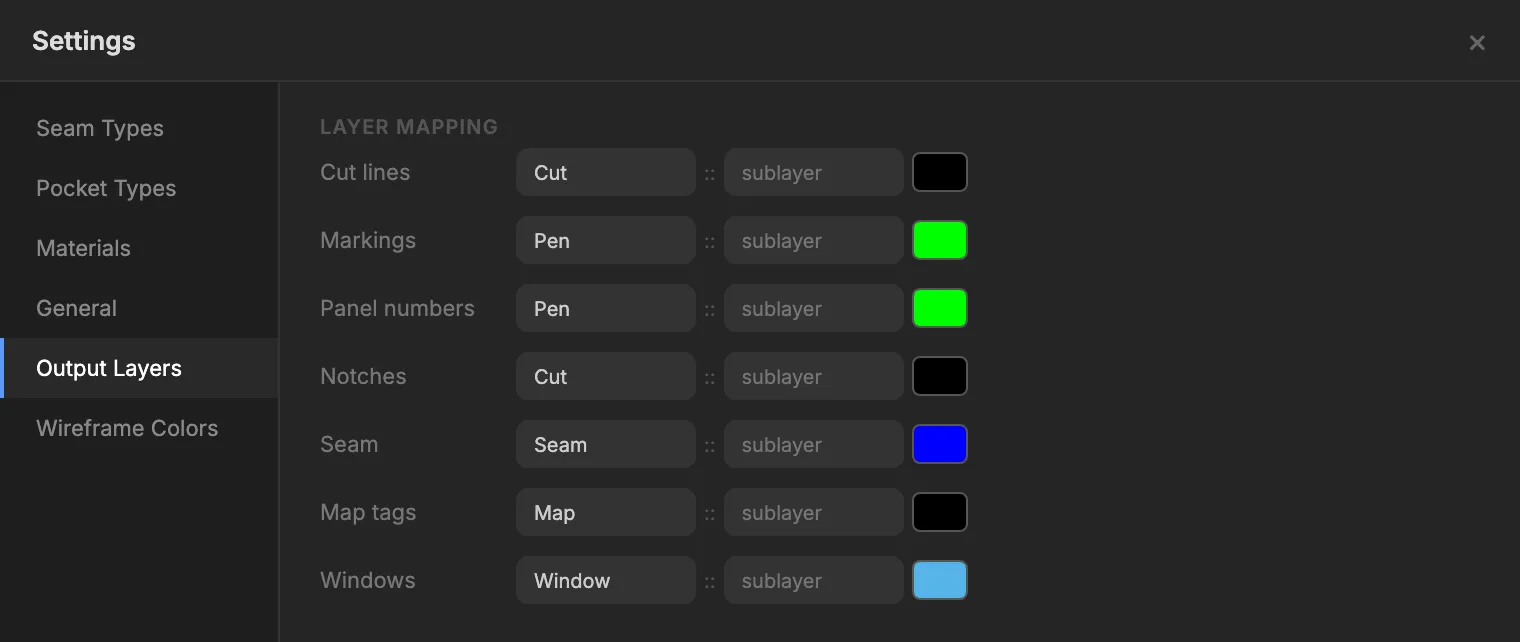
Which Rhino layers the 2D output goes on, and their colours. Under Layer Mapping, each row has its parent layer, an optional sublayer name and a colour.
| Row | Parent layer |
|---|---|
| Cut lines | Cut |
| Markings | Pen |
| Panel numbers | Pen |
| Notches | Cut |
| Seam | Seam |
| Map tags | Map |
| Windows | Window |
Wireframe Colors
Section titled “Wireframe Colors”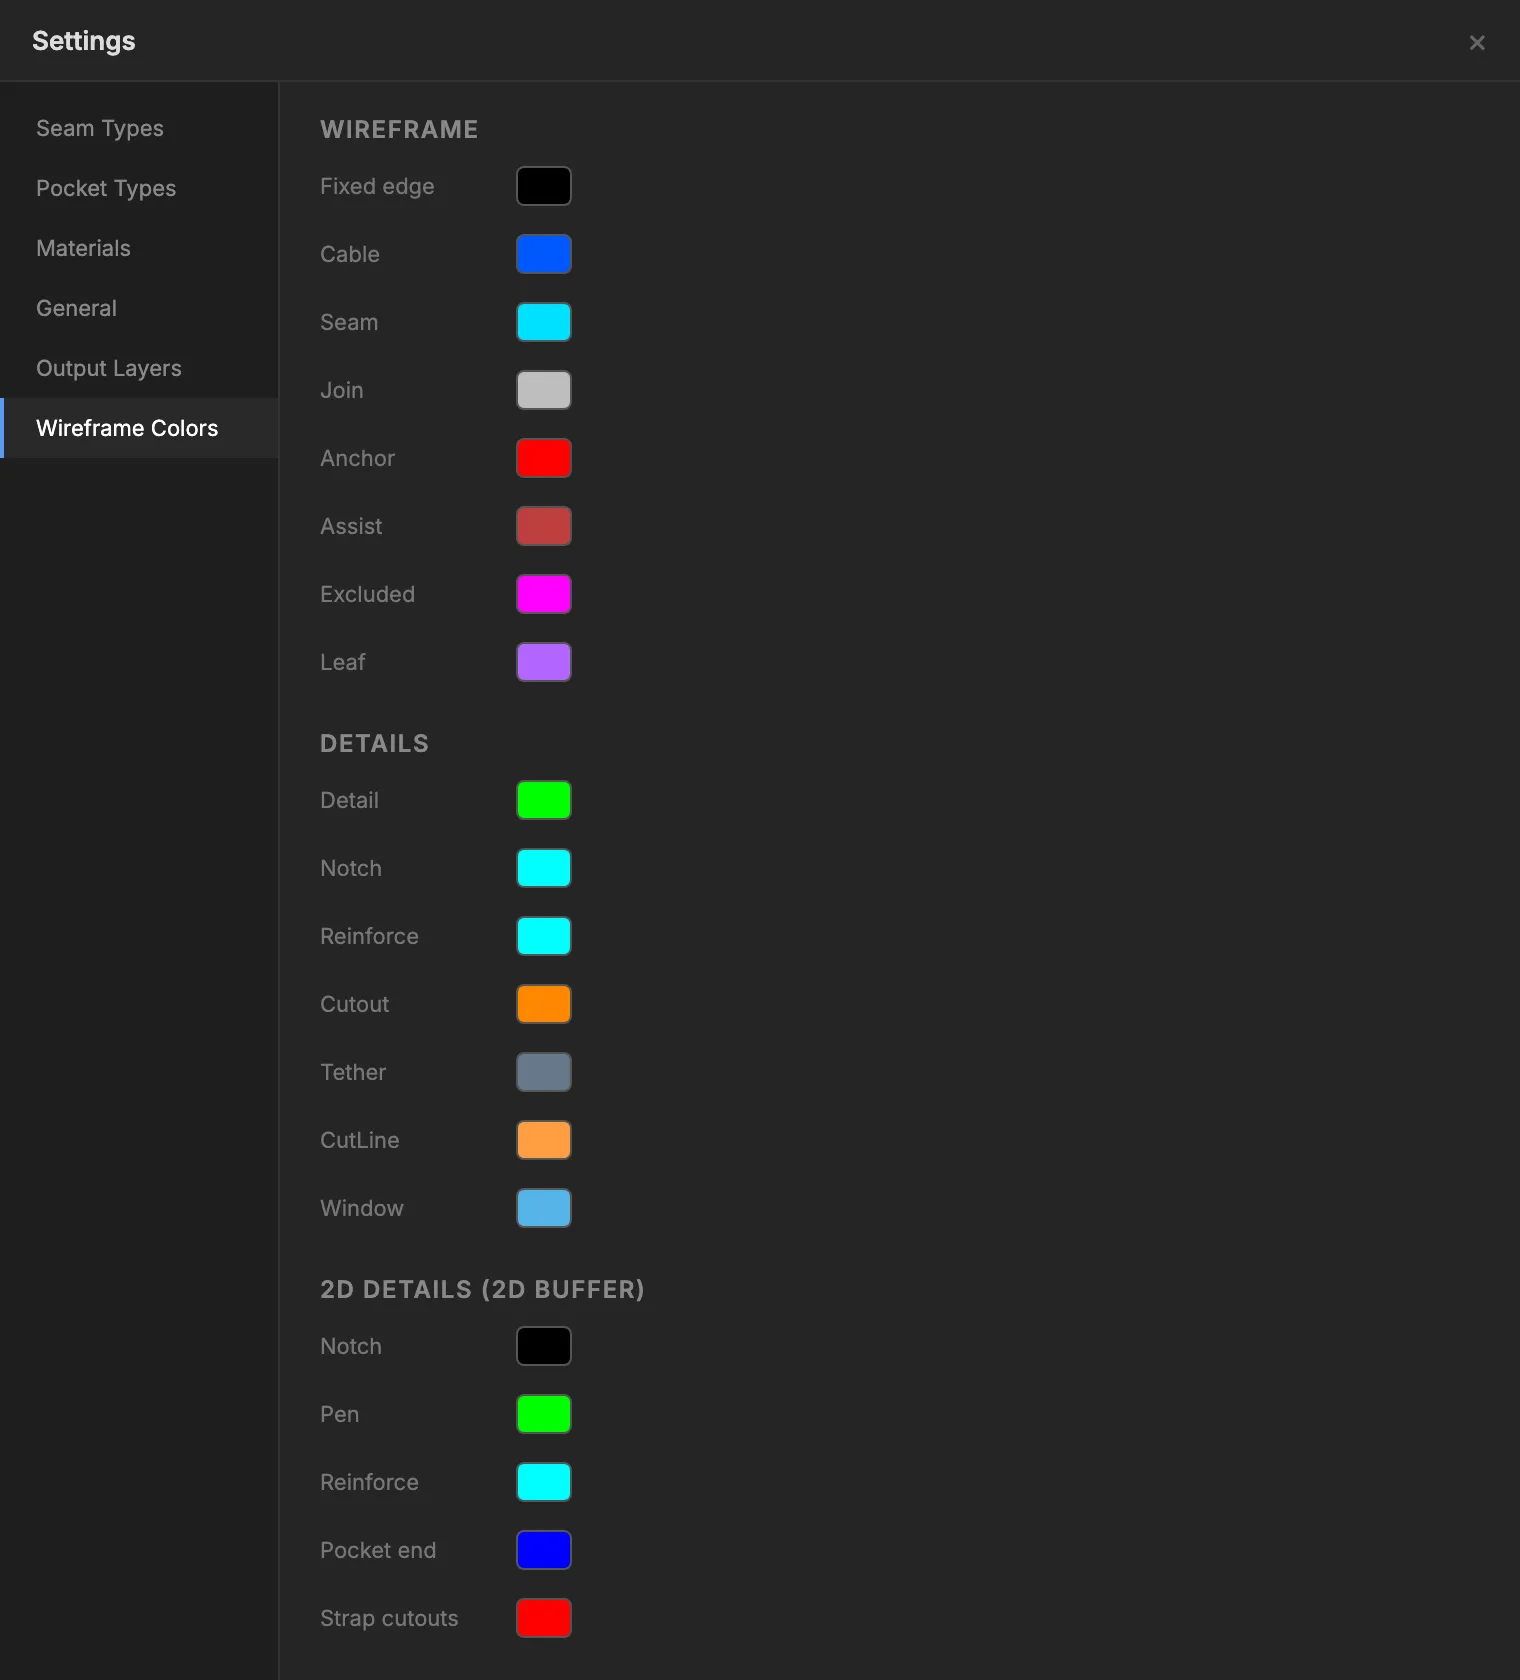
The colours of Fabricator’s layers in Rhino, in three groups:
- Wireframe: the eight edge types, Fixed edge to Leaf.
- Details: Detail, Notch, Reinforce, Cutout, Tether, CutLine, Window.
- 2D Details (2D buffer): Notch, Pen, Reinforce, Pocket end, Strap cutouts. These are used by Fabricator 1’s 2D output.
Experimental panes
Section titled “Experimental panes”With Experimental features on, three more panes appear: Hardware Types, Feature Types and Project Types. They are not covered here.