
The Atlas
The Atlas shows the panels of your wireframes flat, as they will be cut. Open it with the FAB2D chip that floats over Rhino. This page lists everything in it, from the top. For what to do with it, start at 2. Open the Atlas.
The header
Section titled “The header”
| On screen | What it does |
|---|---|
| Fabricator and a build date | Which build of the Atlas this is. Support may ask for it. |
6 panels · 1 chart |
How many panels the map has, and how many charts it is made of. |
| Undo | Undo the last Atlas step (Ctrl+Z). Grey when there is nothing to undo. While the Detail editor or the Window tool is open, it steps back in that editor. |
| Redo | Redo the step (Ctrl+Y or Ctrl+Shift+Z). |
| ⚙ | Opens the Settings window. See Settings. |
| Sync | Calculate the map and the fabrication again from scratch, with no cached answer. |
| Refresh | Read the drawing from Rhino again. Use it when the Atlas and Rhino seem out of step. |
Before the first drawing arrives, the header reads Waiting for wireframe from Rhino…, with Refresh beside it.
A change in Rhino clears the Atlas’s Undo history.
How the toolbar works
Section titled “How the toolbar works”The toolbar has five columns: Layout, Fabrication, Materials, Show and Output. Each has a top part that is always visible and a drop-down with the rest.
- Rest the pointer on a column and its drop-down opens. It closes a moment after the pointer leaves, unless you are typing in one of its fields or a list in it is open.
- One tool at a time. A tool that stays on, such as Split or Notch, lights its name in the top row of its column while it is on. Click that name to put the tool down, or press Esc.
- Column widths. Drag the thin rule after a column to set the column’s largest width; double-click the rule to reset it. The widths are kept.
- The red Close button sits between the Materials and Show columns. It parks the Atlas on the FAB2D chip; opening it again continues where you were.
Every button has a hover text; rest the pointer on it to read what it does.
Layout
Section titled “Layout”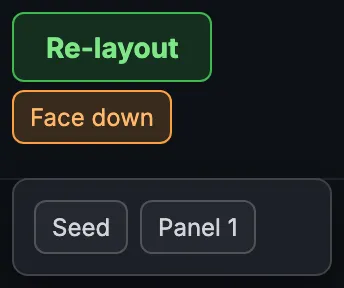
| Control | What it does |
|---|---|
| Re-layout | Lays the panels out again in the default arrangement: those of the selected cards, or of the whole map when no card is selected. One Undo takes it back. |
| Face up / Face down | Which side of the material you see. Face up: the outer side, the face; the markings are prepared for plotting as seen. Face down: the face is flipped down and you see the inner side. The view turns about its centre. To flip one panel, use its right-click menu. |
| Seed | Click a panel to lay its wireframe out again starting from that panel. Alt+click lays the whole map out from it. |
| Panel 1 | Click the panel the numbering starts from. |
Fabrication
Section titled “Fabrication”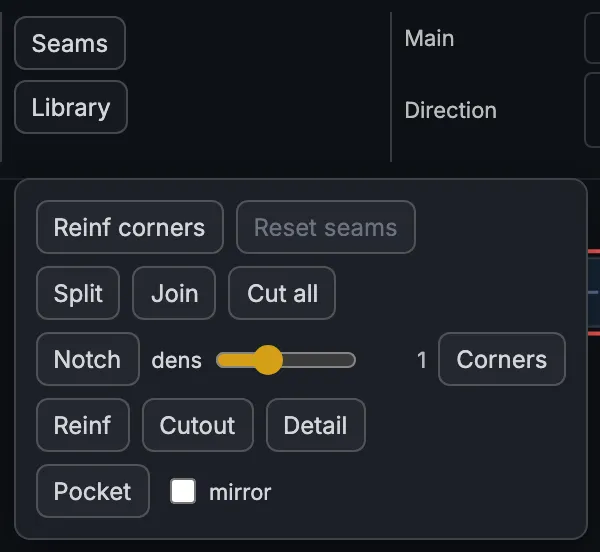
| Control | Key | What it does |
|---|---|---|
| Seams | Click an edge to pick it, Shift+click to add one, Ctrl+click to take one away, then right-click for the seam types. See Assign seams. | |
| Library | Opens and closes the Detail library. See The Detail library. | |
| Reinf corners | Click a dot at the end of a reinforcement strip to switch that end between Neighbor (blue) and Perpendicular (orange). | |
| Reset seams | Sets every seam of the selected panels and cards back to the default Seam of the active seam profile. Grey with nothing selected. | |
| Split | S | Click from edge to edge across a panel to cut it into two panels. Shift draws a curve. |
| Join | J | Click the edge between two panels to join them into one piece. Click a join to separate them again. |
| Cut all | Makes every suggested cut on the map. One Undo takes them all back. | |
| Notch | N | Click near a panel edge to add a notch; the neighbouring panel gets its match. Click a notch to remove it. |
| dens | How many automatic notches: 0 to 3 in steps of 0.25. 1 is the default, 0 is none. Your own notches always stay. | |
| Corners | Click a diamond at a cut corner for a menu of its ending: Miter, Square or Fold. The menu does not mark the current ending. | |
| Reinf | R | Draw a custom reinforcement: a path, or a circle with Ctrl. |
| Cutout | C | Draw a cutout: a closed shape inside a panel is a hole, an open path across its edge a notch. With Cutout on, a click inside a cutout selects it; Delete removes it. |
| Detail | D | Draw a detail mark. |
| Click edges, then right-click for the pocket menu. | ||
| mirror | Mirror each finished pocket across a straight line through the piece. |
The letters are keyboard shortcuts; they are not written on the buttons. Reinf, Cutout and Detail draw as described in Reinforcements, cutouts and detail marks; Split, Join and Notch are in 6. Shape and detail the panels.
Materials
Section titled “Materials”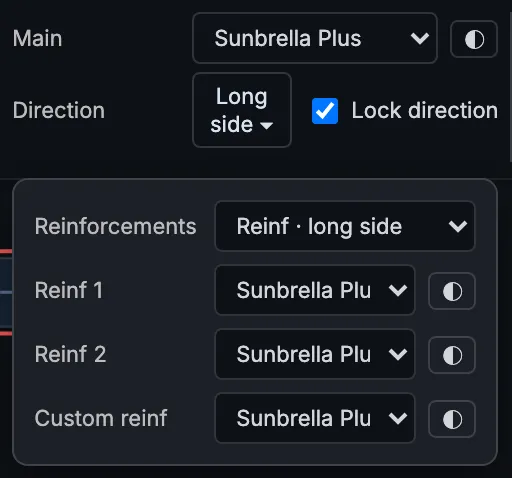
| Control | What it does | Default |
|---|---|---|
| Main | The material for the whole project. The list has the materials you used last under RECENT, then each material type. Choosing Main also sets Reinf 1, Reinf 2 and Custom reinf to it. | none |
| Colour button beside a material | Gives the material a colour, from the colours it already has in the project or a new one with a name. Shows ◐ while there is no colour; grey until a material is chosen. Its hover text names the row: Main colour, Reinf 1 colour, Reinf 2 colour, Custom colour. | |
| Direction | The rule that sets each panel’s material direction: Long side, or one of four rules for the top and the sides (Top up-down, Sides up-down and so on). Choosing a rule, even the current one, gives every panel its automatic direction again. | Long side |
| Lock direction | Keeps the direction lines visible but not draggable, so a drag over one moves the panel. Untick it to drag one panel’s dashed line (Shift snaps to 15°) or double-click it to turn it 90°. | on |
| Reinforcements | The Reinforcement grain list: how reinforcements turn onto the material on the nest sheet: Reinf · long side follows the patch’s longer side, Reinf · inherit keeps its panel’s direction. It does not move anything on the map. | Reinf · long side |
| Reinf 1, Reinf 2, Custom reinf | The material, and colour, of each kind of reinforcement. | Main |
See Set the material.
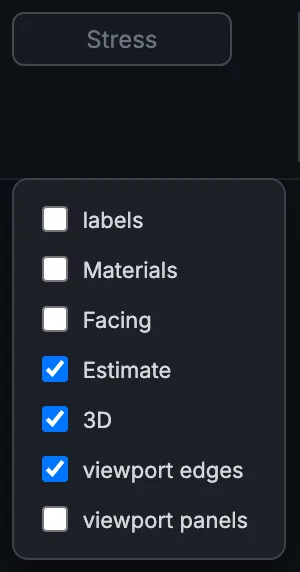
These change what you see, not the project.
| Control | What it does | Default |
|---|---|---|
| Stress | Colours the solved panels by fabric stress, here and in the 3D preview; linked to the Stress map in the Fabricator panel. Needs a solved panel; its hover text says why it is grey. | off |
| labels | Writes each panel’s number on its fill in the 3D viewport. | off |
| Materials | Writes each piece’s material small on the map. | off |
| Facing | Writes each piece’s facing, Face up or Face down, small on the map. | off |
| Estimate | Net panel area, and material consumption in length assuming 70% utilization, above each card. | on |
| 3D | Fills the panels in the 3D viewport, each in its own colour. | on |
| viewport edges | Hovering an edge here highlights it in the 3D viewport, and the other way round. | on |
| viewport panels | Hovering a panel here highlights it in the 3D viewport, and the other way round. | off |
Output
Section titled “Output”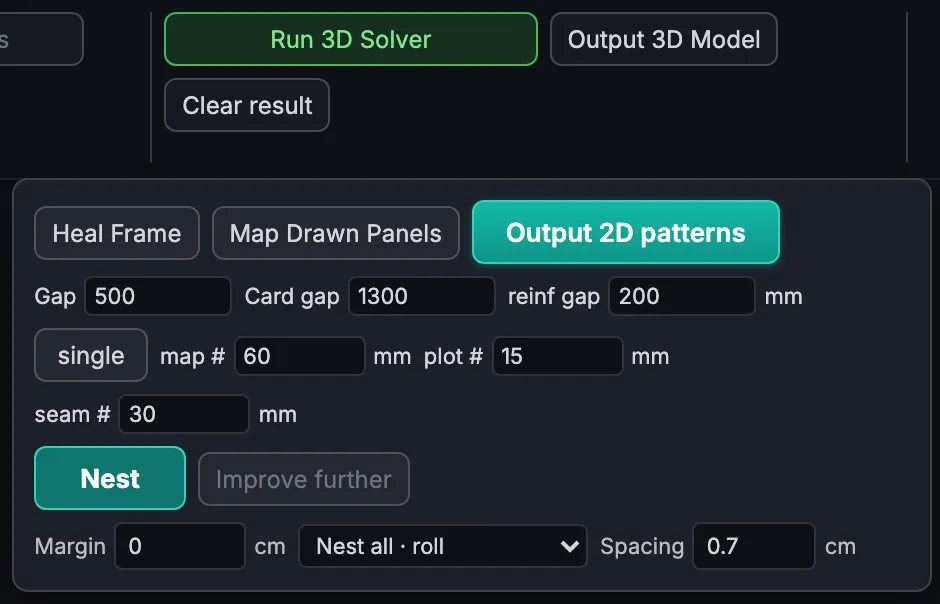
| Control | What it does | Default |
|---|---|---|
| Run 3D Solver | Solves the selected cards, and the Fabricator curves selected in Rhino. One wireframe needs no selection. While it waits it reads Waiting for the map…, Connecting to Rhino…, Reading Rhino changes…, Waiting for Rhino to confirm… or Waiting for the drawing…; press it again to cancel. See 5. Solve in 3D. | |
| Output 3D Model | Puts the solved meshes into Rhino, one joined mesh per wireframe on Render::Fabric, and clears the 3D preview. |
|
| Clear result | Removes the solved 3D result and its preview. The drawing and the panels stay. | |
| Heal Frame | Snaps microscopic gaps and joins Fixed edge chains, on the selected cards’ wireframes and the Fabricator curves selected in Rhino. | |
| Map Drawn Panels | Opens the map of a card made from drawn panels. See From panels that are already flat. | |
| Output 2D patterns | Draws the flat panels in Rhino on the output layers. | |
| Gap | Room between the panels of one wireframe on the map; a change respaces them at once. | 500 |
| Card gap | Room between cards; the next Re-layout uses it. | 1300 mm |
| reinf gap | Clearance between a panel and its reinforcement pieces. | 200 mm |
| single / double | One reinforcement strip per run, or a second one a reinf gap further out. | single |
| map # | Height of the big panel number in the 2D patterns. | 60 mm |
| plot # | Height of the plot numbers at a panel’s corner and on each reinforcement. | 15 mm |
| seam # | Height of the seam type names outside the cut line; only seams that are not the default get one. | 30 mm |
| Nest | Nests the pieces of the selected cards, or of the open card, each material on its own roll, in about 30 seconds in all, and draws the layout in Rhino. | |
| Improve further | Carries on from the best layout, up to 120 seconds in all. | |
| Cancel | Shows while a nest runs. Stops it; the last nest stays. | |
| Margin | Held back from the usable width, so a curved seam cannot run off the roll, in cm (in inches with Imperial units). | 0 cm |
| Nest all · roll / Available stock | The Nesting stock mode list: nest everything on the roll, or fill your stock lengths first. Available stock adds the Stock lengths list. | Nest all · roll |
| Spacing | The smallest distance between cut outlines, in cm (in inches with Imperial units). | 0.7 cm |
See 7. Output and nest.
Right-click menus
Section titled “Right-click menus”On a panel
Section titled “On a panel”Right-click a panel, or a selection of panels or cards. The rows, in order:
- Copy panel (Copy panels): a copy of each beside it.
- Delete copy (Delete copies): only when every selected panel is a copy.
- Window (Windows): opens the Window tool on these panels.
- Face up / Face down: the face these panels show; Flip panels when they differ.
- Colour… with the material’s name: its colour. Grey when the selected pieces have different materials.
- Piece material: Use Main with the Main material’s name, then RECENT, then each material type. A choice clears the selection.
On a piece
Section titled “On a piece”Right-click a piece that is cut on its own: a reinforcement strip, a custom reinforcement, a pocket or a window’s glass. The rows, in order:
- Window type: only on a glass; gives that glass, and the windows joined to it, its own window type.
- Flip face up / Flip face down.
- Delete copy: only on a copy or a second strip.
- Colour….
- Use and the piece’s own slot (Main, Seam reinf 1, Seam reinf 2 or Custom reinf) with its material, then RECENT, then each material type.
While a nest runs, every row is grey. A click elsewhere closes a menu.
Other menus
Section titled “Other menus”| Menu | Opens with |
|---|---|
| Seam types | Seams on, edges picked, right-click. Beside each seam type: ✎ Edit seam type, ⧉ Duplicate seam type, ✕ Delete seam type. See Assign seams. |
| Pocket menu | Pocket on, right-click. See Copies and zipper pockets. |
| Shape (Draw, Circle) | Reinf, Cutout, Detail or the Window tool on, hold Ctrl. |
| Miter / Square / Fold | Corners on, click a diamond. |
Moving around
Section titled “Moving around”| Action | How |
|---|---|
| Zoom | Roll the mouse wheel. The view zooms around the pointer. |
| Pan | Drag with the right or the middle mouse button, or hold Space and drag. |
| Select | Click a panel. Drag over empty map to select several: from left to right a blue box, from right to left a green dashed box. |
| Move | Drag a panel. |
| Copy | Alt+drag a panel or a piece. |
| Turn | Drag the round handle off the top-right corner of the selection. Hold Shift to snap to 15°. Esc while turning cancels it. |
| A card’s label | The small yellow number at the bottom right of a card. Double-click it to rename the card: Enter saves, Escape cancels, an empty field goes back to the automatic number. Shift+click or Ctrl+click a label to select its card. |
| A direction line | Double-click it to turn that panel’s material direction 90° (with Lock direction off). |
| Right-click on empty map | With no tool on and nothing selected, picks the last tool up again. With the Detail library open, starts the last detail again. |
| Undo, Redo | Ctrl+Z; Ctrl+Y or Ctrl+Shift+Z. |
Zooming in until one card fills about half the map makes it the active card; zooming out again releases it.
Esc first cancels whatever is half done: a detail being placed, a drag, a turn, a half-drawn shape, the Shape menu. With nothing half done, it puts the tool down and clears the selection. All the keys are on Keys and mouse.
What the map draws
Section titled “What the map draws”- A panel’s outer line is its cut line, with the seam allowance added; the inner line is the edge you drew. A solved panel is outlined in white, a panel shown from its preview in red.
- The big number is the panel number, the small one in its corner the plot number. The dashed line is the material direction; the short ticks are notches.
- Light-blue dotted lines across a panel are suggested cuts: the panel is wider than its material. Each has a number and a round handle at each end.
- With Estimate ticked, each card shows its area and roughly how much material it takes above it. With panels selected, the estimate for just the selection shows at the top left.
Status lines
Section titled “Status lines”The only messages the Atlas shows on the map are the status lines at its foot:
| Line | Meaning |
|---|---|
| Calculating… 2 panels pending | The map is being worked out again. Each pending panel shows a small spinner where its number goes. |
| Waiting for the server map. | The first map has not arrived yet. |
| A seam edit is waiting for the map to update; it is made when the map has. | Your seam change is held until the map is ready. |
| Fabrication out of date — recalculate | The cut lines on screen are older than the drawing. |
Every other warning, and every refusal of a cut, a join or an output, goes to
Rhino’s command line, as a line starting [Fabricator] Atlas JS:. See
Messages.