
5. Solve in 3D
The 3D solver shapes the fabric between its edges and flattens every panel from that shape. Until then, the panels in the Atlas are a preview, flattened straight from the wireframe. Not every project needs more than that.
Do I need the 3D solve?
Section titled “Do I need the 3D solve?”| Project | What to do |
|---|---|
| Simple cushions and flat covers | No. The preview panels are already right: go straight to the output. |
| Output 2D patterns lists a panel as approximate | That panel’s preview is not exact. Solve it. |
| Shapes that stretch and curve: biminis, sprayhoods, tensioned covers | Yes. Run the 3D solver before you cut. |
A full 3D solve needs a paid plan; see Plans. The preview in the Atlas works on any plan.
Running it
Section titled “Running it”-
In the Fabricator panel, open 3D Solver and choose the Mesh detail: Very low, Low, Medium, High or Production. Low, the default, is quick while you work; Production is for the final output. Finer detail takes longer.
-
Set Form for the kind of job (see the table below). The default, 0.975, is a good starting value.
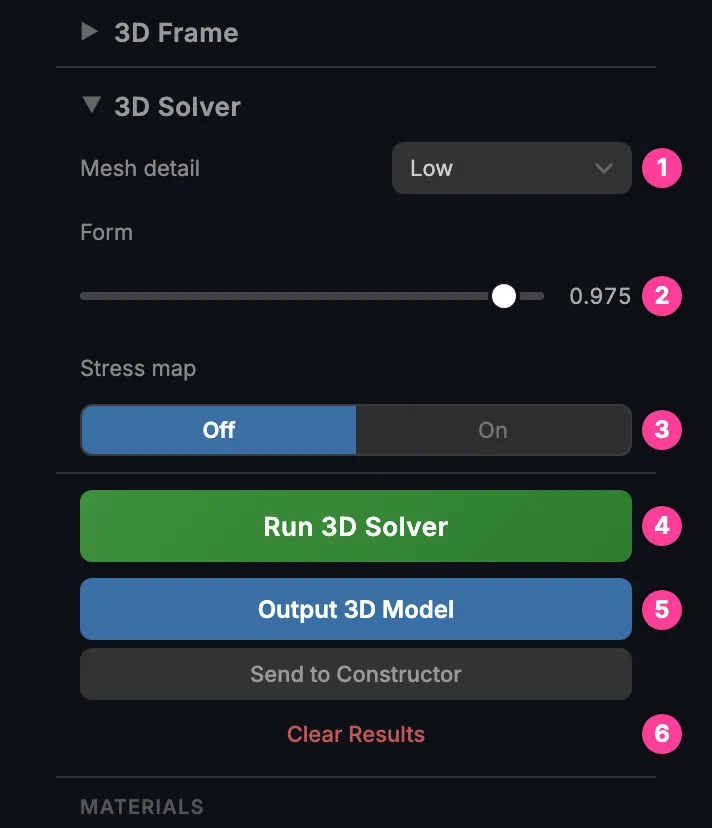
- Mesh detail. How fine the solved model is: Very low to Production. Low is the default.
- Form. How much shape the fabric gets, 0.600 to 1.000. The default is 0.975.
- Stress map. Colours the solved 3D preview by fabric stress.
- Run 3D Solver. Solves the selected wireframes.
- Output 3D Model. Puts the solved fabric into the drawing as meshes.
- Clear Results. Removes the 3D preview and the solver results.
The 3D Solver section of the panel and the buttons below it. -
Select the wireframes to solve in the Rhino viewport. In the Atlas you can also select their cards; the panel’s button uses the viewport selection only. A drawing with one wireframe needs no selection.
-
Press Run 3D Solver, in the panel or in the Atlas’s Output column: it is the same solve. The panel loads the Atlas behind its chip if it is not open.
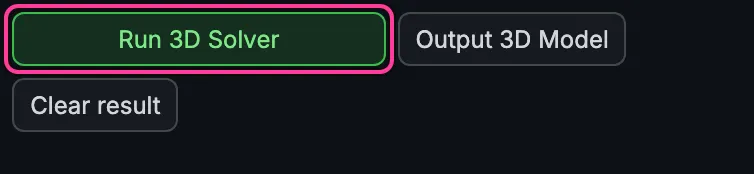
Run 3D Solver in the Atlas's Output column.
While it works, the Atlas’s button turns orange and says what it is doing (the panel’s reads Solving…): Solving…, or what it is waiting for first: Waiting for the map…, Connecting to Rhino…, Reading Rhino changes…, Waiting for Rhino to confirm… or Waiting for the drawing…. Press it again to cancel while it waits.
If nothing starts, read the status line at the foot of the Fabricator panel: for example, “Select a wireframe in the viewport to solve” when the drawing has more than one wireframe and none is selected.
Choosing the Form value
Section titled “Choosing the Form value”Form says how much shape the solver gives the fabric between its edges, from 0.600 to 1.000. At 1.000 the panels come out flat; the lower the value, the more the fabric is shaped.
| Form | Use it for |
|---|---|
| 1.000 | Flat panels. Use it when you solve cushions. |
| 0.985, 0.990, 0.995 | Small biminis, sprayhoods and enclosures, which need to stay close to flat. |
| 0.975 | The default, and a good starting value for everything else. |
| Below 0.975 | Winter covers. |
What you get
Section titled “What you get”- The solved fabric appears in the Rhino viewport. A panel whose material has a colour is drawn in that colour; a panel with no colour is drawn red.
- In the Atlas, each solved panel takes its solved shape, and its outline turns from red to white. Its number, seams, windows, details and place on the page are kept.
- Stress map (in the panel) or Stress (in the Atlas’s Show column) colours the solved fabric by stress, in both places: switching one switches the other. With nothing solved, Stress is greyed.
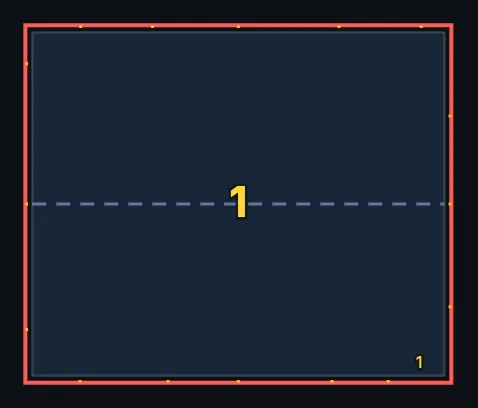
The same red outline comes back when you change the drawing after a solve, so that a solved panel no longer fits it: solve again.
Drawing on the solved fabric
Section titled “Drawing on the solved fabric”Once a wireframe is solved you can draw straight onto the 3D fabric. In the panel’s 3D Frame section, Draw on Mesh gives Polyline, Curve and Points; the Detail, Cutout and Reinf buttons under Details draw a detail line, a cutout or a reinforcement outline on the solved mesh. Without a solved mesh they start an ordinary Rhino polyline on their layer instead. See Details.
The 3D output
Section titled “The 3D output”Output 3D Model, in the panel or in the Atlas, puts the solved fabric into the drawing as meshes, one per wireframe and colour, and clears the 3D preview. With nothing selected it outputs every solved wireframe.
- Fabric with no colour goes on the layer Render::Fabric; each coloured fabric gets its own layer under Render, in its colour.
- Windows are cut out, and the glass goes on Render::Window, see-through.
- Explode a mesh to get the panels one by one.
Use it for renderings and for checking the fit.
Clearing the result
Section titled “Clearing the result”Clear result in the Atlas, or Clear Results in the panel, removes the solved result and its 3D preview. The drawing and the panels stay; the panels go back to their red preview.