
1. Draw the wireframe
The wireframe is the set of curves that marks every edge of the fabric: where it meets the frame, where panels are sewn together, where a cable runs. Everything else is worked out from it. You draw it in Rhino, with a few extras that Fabricator adds to make drawing one easier.
Drawing and giving roles
Section titled “Drawing and giving roles”Draw with ordinary Rhino commands: lines, polylines and curves. Split, Trim and Move work on wireframe curves as on any others.
Each curve has an edge type: its role in the fabric. The edge type is the curve’s layer, and you set it with the buttons under Edge Types in the 3D Frame section of the Fabricator panel.
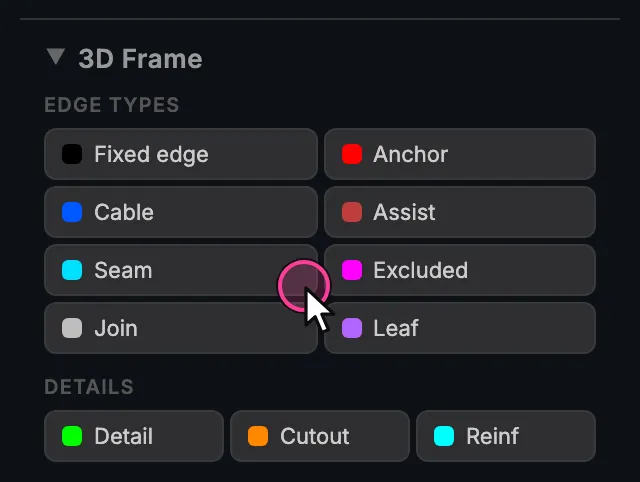
- With curves selected, click an edge type. The curves move to that layer.
- With nothing selected, click an edge type and draw. Rhino starts a polyline on that layer (for Anchor, it starts placing points).
- Either way, the click makes that layer the current layer, so what you draw next, and the side edges of an extrude, land on it.
Each wireframe in the drawing becomes its own card in the Atlas.
Wireframe connectivity
Section titled “Wireframe connectivity”To Rhino, every curve is an object of its own: move one and its neighbours stay behind. Fabricator adds what a wireframe needs. Connectivity runs in the background all the time: when a curve end is snapped onto another curve, Fabricator remembers the connection and keeps it.
- Snap to connect. An end snapped onto another end makes a shared corner. An end snapped anywhere along another curve stays on that curve.
- Then move anything. Move or reshape a curve, or drag a corner point, and the curves connected to it follow. You can transform a whole wireframe, or any part of it, without breaking it.
- One Undo takes back your edit together with everything that followed it.
- Double-click a wireframe curve to select the whole wireframe it belongs to. Shift+double-click adds a wireframe to the selection; Ctrl+double-click takes it out.
FrameConnect in the Frame group is the switch. FrameConnect: On (green) keeps curve ends that meet together; FrameConnect: Off (red) lets curves move on their own. Leave it on. Switch it off only to pull curves apart on purpose, and switch it on again afterwards: Fabricator remembers the setting, so off stays off the next time you start Rhino.
Extrude: from an outline to a wireframe
Section titled “Extrude: from an outline to a wireframe”Hold Shift while you move wireframe curves and the move becomes an extrude. The curves go where you drag them, a copy stays where they were, and Fabricator draws the side edges between the two. One flat outline becomes a complete wireframe in a single move.
- How to move. With Shift held, drag a gumball arrow for a straight move, or drag the curves freehand. For an exact distance, hold Shift while you use the gumball arrow and type the distance.
- Where side edges are drawn. A polyline gets one at every corner. An open smooth curve gets one at each end. A closed smooth curve, such as an oval, gets none: draw those yourself.
- Their role. The side edges go on the current layer when that is an edge-type layer, otherwise on the layer of the curves you extruded.
- The whole extrude is one Undo. Any wireframe curves can be extruded, a single edge too.
Shaping what you extruded
Section titled “Shaping what you extruded”A box is only the start. Because of the connectivity, you change the shape by moving a part of it: select one edge, or one corner point, and move it. Everything connected follows. Move a top edge sideways for a sloped side, or lift one end for a wedge. With the Atlas open you see the flat panels change as you go.
The edge types
Section titled “The edge types”| Colour | Edge type | Use it for |
|---|---|---|
| black | Fixed edge | Rails, frame tubes, tracks: where the fabric is held exactly where you drew it. |
| blue | Cable | A free edge with a cable or a tensioned hem. |
| light blue | Seam | Where two panels are sewn together. |
| grey | Join | A line the fabric stays on but is not cut along, such as a fold. |
| red | Anchor | A point, not a curve, that ties the fabric down. |
| dark red | Assist | A helper line inside a piece that shapes the fabric without splitting it. |
| magenta | Excluded | Crossing out a loop that carries no fabric. |
| purple | Leaf | A third piece on a shared edge, such as a divider. |
Each is explained, with drawings, in Edge types.
A frame that works
Section titled “A frame that works”Panels appear only where edges close a loop, so the ends of your curves must meet.
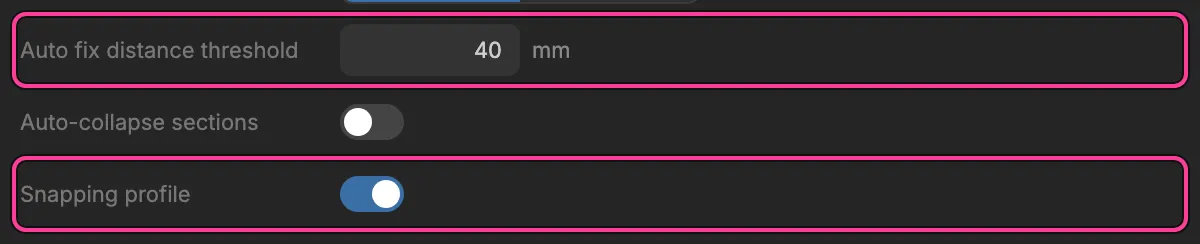
- Draw with object snaps on. Settings → General → Snapping profile keeps Rhino’s End, Point, Intersection, Midpoint and Vertex snaps ready for you. It only adds to your snap settings; it never removes one.
- Press Check before you go on. It marks open ends, near misses and overlaps in the viewport. It also warns about a curve end that stops within 2 mm of a corner without reaching it; that distance is fixed. How far apart two ends may be and still count as a near miss is the Auto fix distance threshold in Settings → General, 40 mm unless you change it.
- Heal Frame repairs the selected curves: it snaps microscopic gaps, moves ends that stop just short of a corner onto it, and joins Fixed edge and Join chains. With nothing selected it asks you to select the curves. The status line of the panel says what it did, for example “Selection already clean”.
The frame tools
Section titled “The frame tools”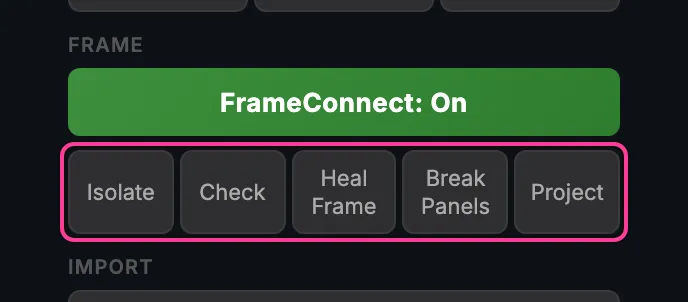
| Tool | What it does |
|---|---|
| Isolate | Hides everything except the Fabricator frame. The button then reads Show All: click it to bring everything back. |
| Check | Marks open ends, near misses and overlaps in the frame. |
| Heal Frame | Snaps microscopic gaps on the selected curves and joins Fixed edge and Join chains. |
| Break Panels | For a layout drawn flat, such as a set of cushions drawn as one plan. See below. |
| Project | Projects the selected curves, as seen from the current view, onto the wireframe’s faces. See below. |
Break Panels
Section titled “Break Panels”Break Panels breaks the selected wireframes, or all of them when nothing is selected, into separate panels. Every closed loop becomes its own closed outline, 5 mm from its neighbours, ready to be extruded on its own. A curve shared by two loops becomes two curves, one for each. The whole break is one Undo.
A wireframe that already folds in 3D, such as a box, cannot be broken: break the flat piece first, then extrude it. If the panels would collapse when moved apart, nothing is broken and the status line says so.
Project
Section titled “Project”Project is for drawing a line in a flat view and putting it onto a frame you already have. Select the curves, look at the wireframe from the view you drew them in, and click Project. The curves you drew are replaced by the projected ones. A curve that crosses no closed face of the wireframe is left as drawn. In a perspective view, the camera’s direction is used, and the status line says so.
Break Panels and Project are for particular kinds of project. Most wireframes never need them.