
Windows
A window is a clear opening in a panel. The glass is cut as a piece of its own, in the window’s material, and nested like any other piece. A window is made in two stages in the Window tool: first where its corners are, then its shape.
Open the Window tool
Section titled “Open the Window tool”Right-click a panel, or a selection of panels, and choose Window (Windows for several).
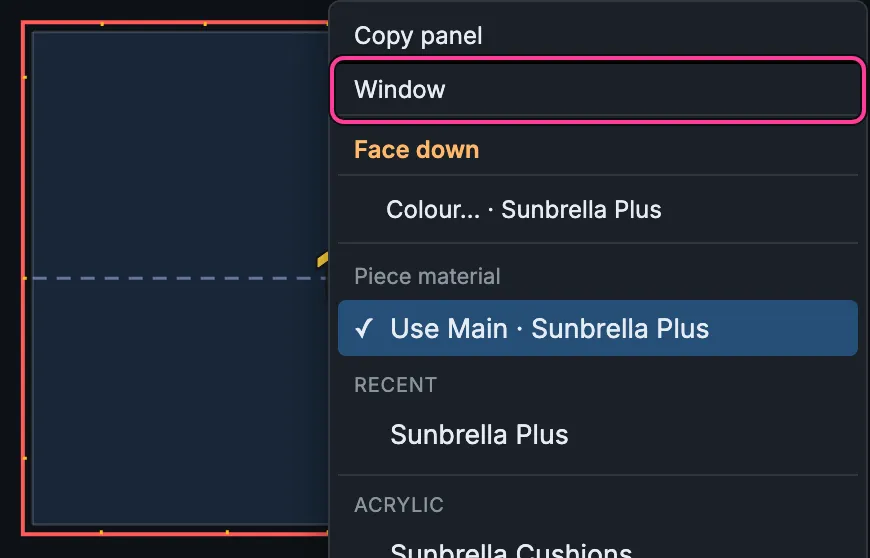
The Window tool opens on those panels, with the Window types list beside it. Window lights in the Fabrication column, and a line at the foot of the map says what to do next. Click another panel to add it.
Stage 1: the corners
Section titled “Stage 1: the corners”The tool suggests a window and where its sides break, with a yellow dot at each break.
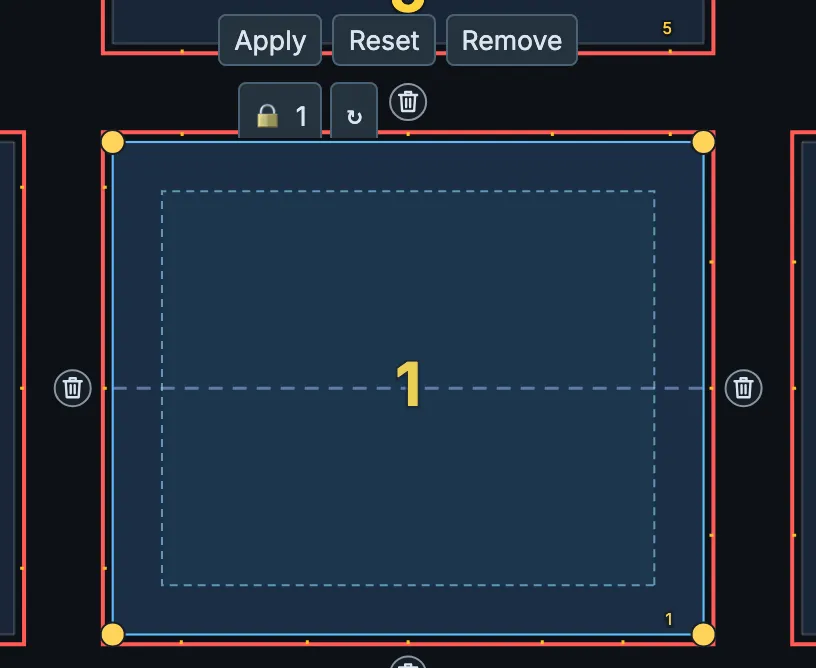
- Click a break dot to turn that break on or off. At least three must stay: the tool says Keep at least three side breaks.
- Click the bin beside a side to delete that side, so the window runs to the panel’s edge there. Click it again to restore the side. At least two sides must stay: Keep at least two sides.
- Right-click to confirm the corners and go on to the shape.
Stage 2: the shape
Section titled “Stage 2: the shape”Each side now carries a letter, A to D, and each corner a dot.
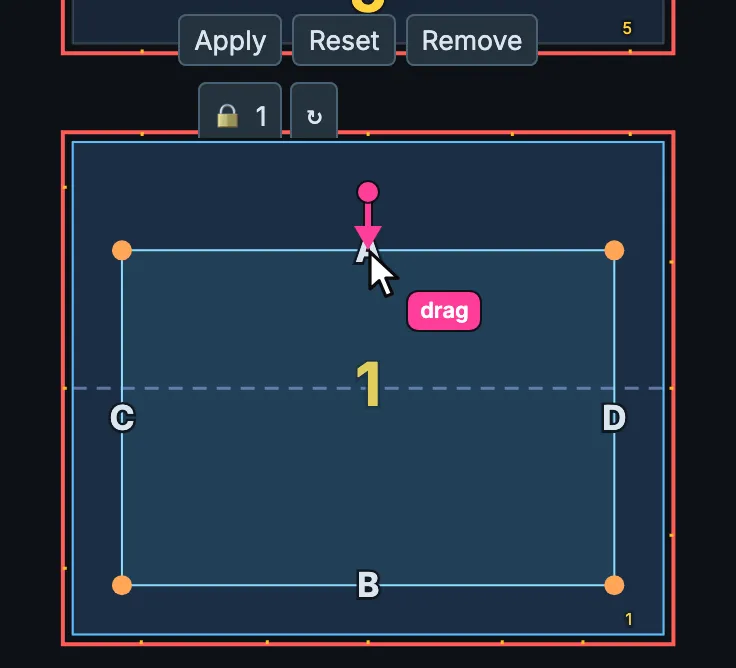
- Drag a side’s letter to change its offset from the panel edge.
- Drag a corner’s dot to change its radius. Shift+drag moves the corner itself.
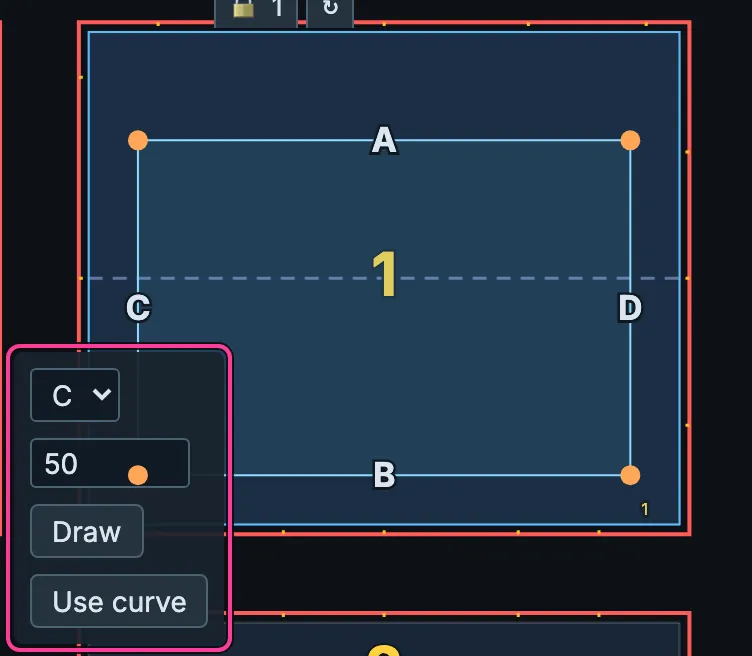
- Right-click a side’s letter for its settings: Edge assignment (which of the roles A to D it has), its offset as a number, Draw to draw the side yourself (click points, hold Shift for a curve, type a number for a segment’s length, right-click to finish), and Use curve to replace the side with a curve you drew on this panel.
- Right-click a corner to type its Corner radius.
Above each window are two buttons:
- The lock with the panel’s number links this window to the others: windows that are locked change together, so a set of windows in matching panels keeps the same dimensions. A corner’s lock shares its radius the same way.
- ↻ turns the roles A to D round the window, and the linked dimensions follow at once.
Finish
Section titled “Finish”The buttons above the selected windows:
| Button | What it does |
|---|---|
| Apply | Builds the windows and closes the Window tool. |
| Reset | Puts the selected windows back to automatic sides and the default dimensions. |
| Remove | Removes the selected windows and the pieces made for them. |
While the tool is open, Undo and Redo, and Ctrl+Z / Ctrl+Y, step through the tool’s own changes. Esc cancels a drag, a cut or a side being redrawn; with nothing half done, it closes the tool.
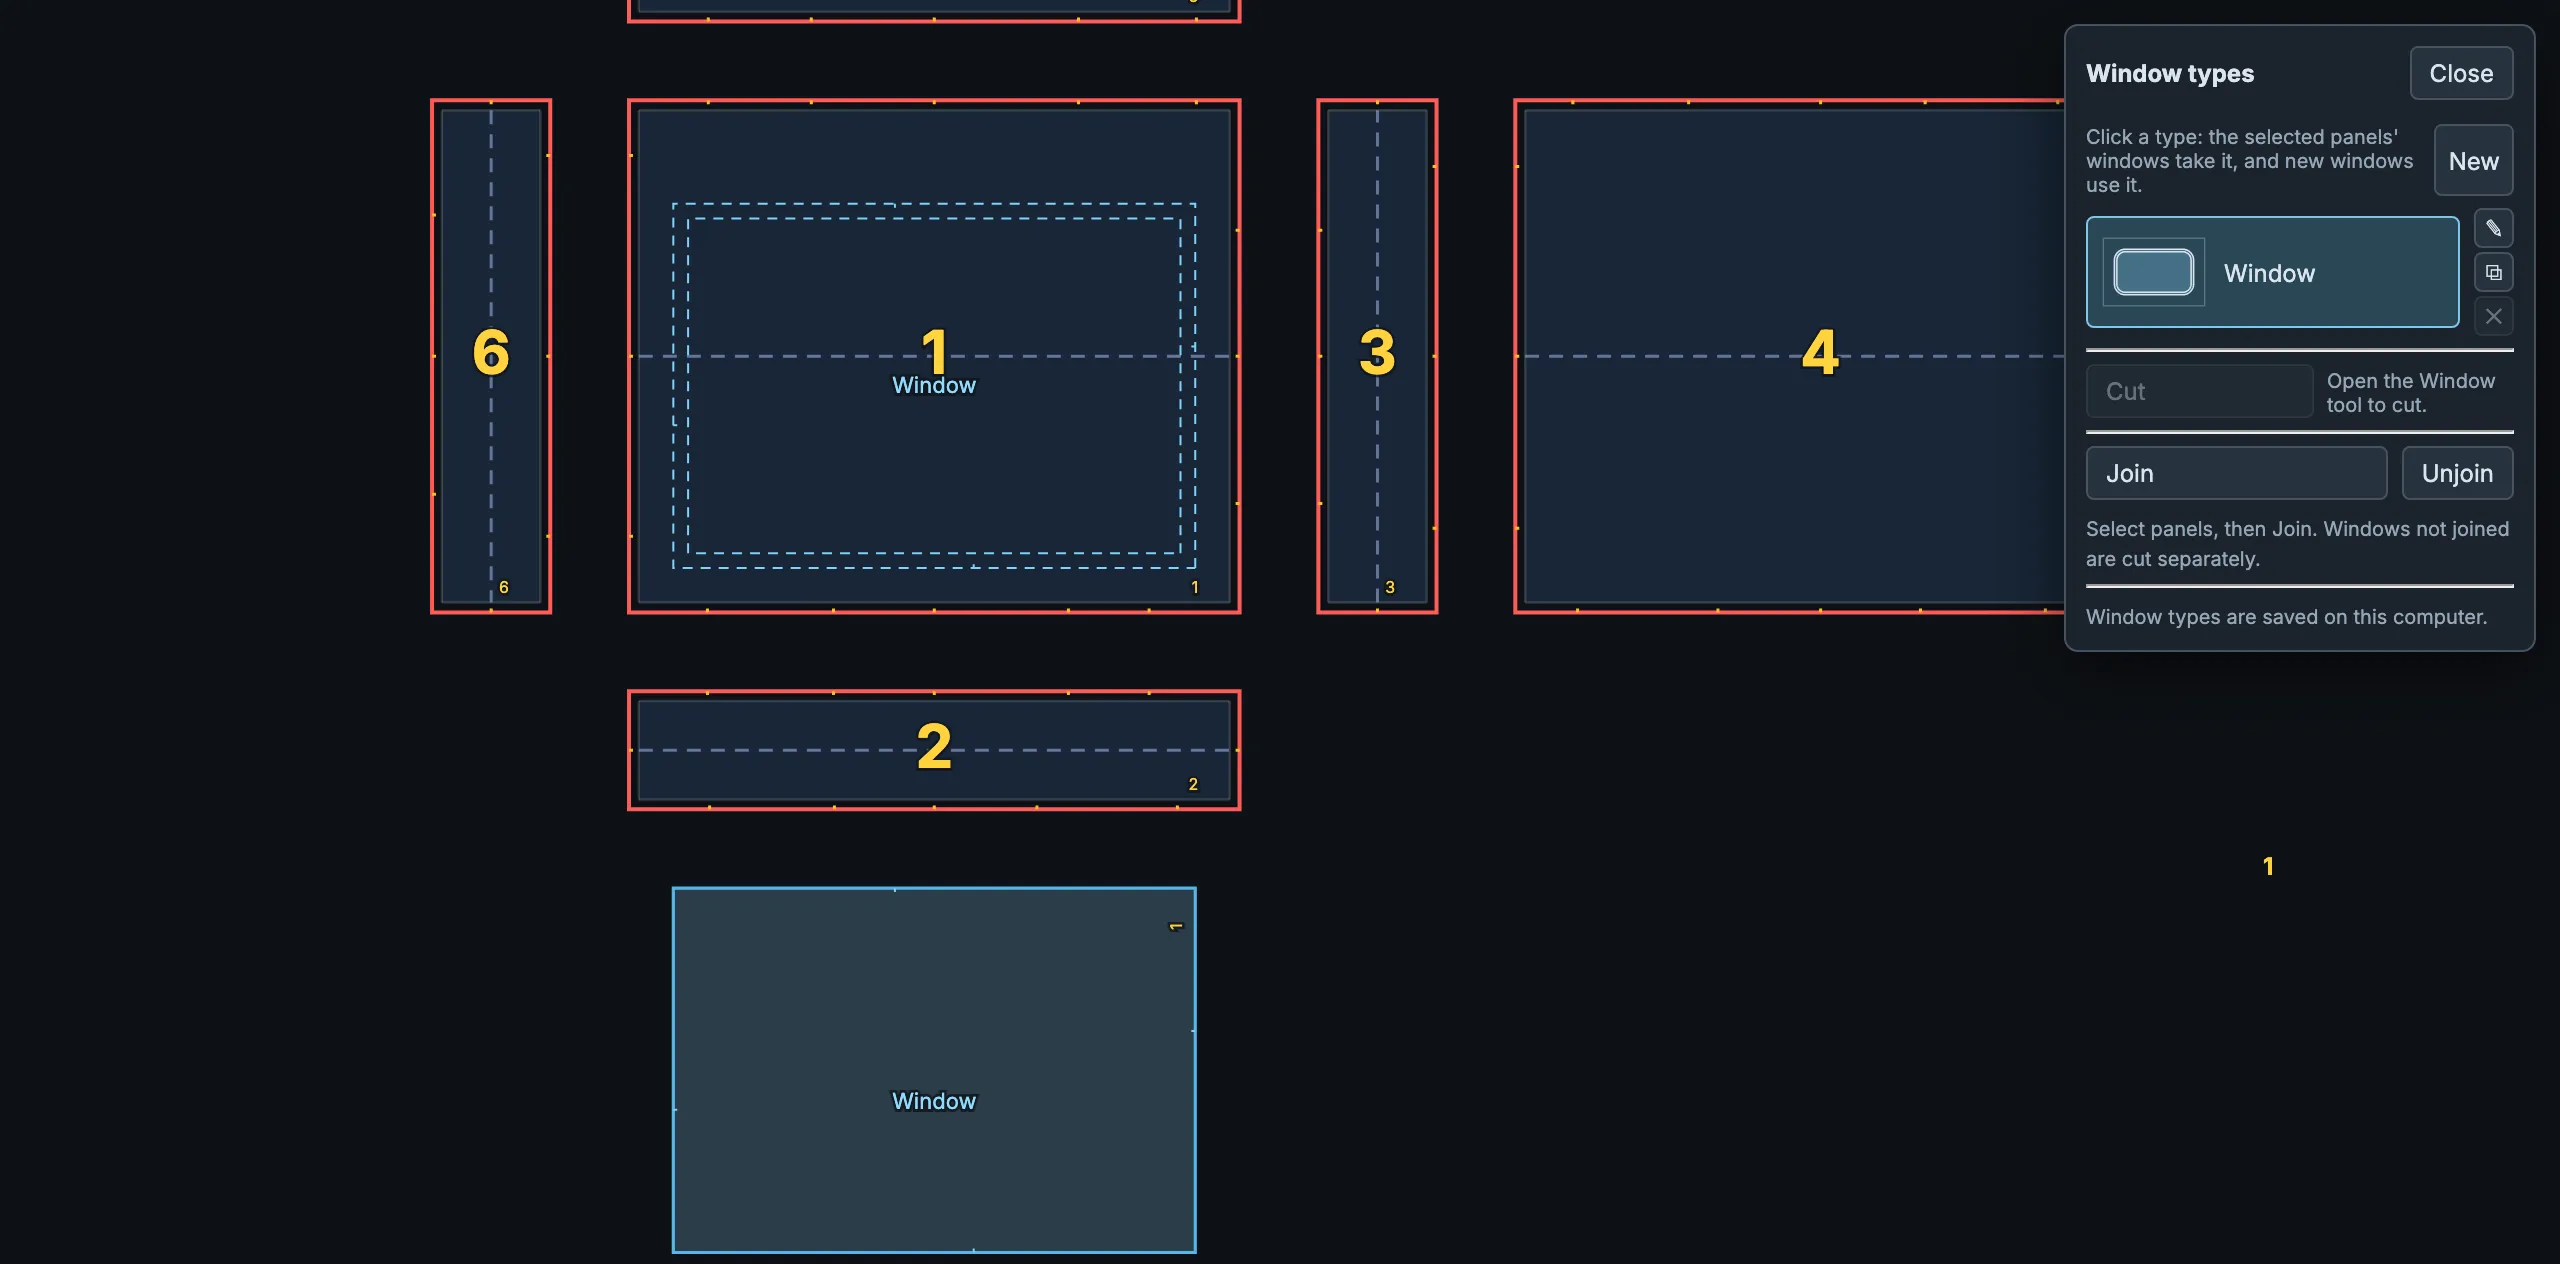
Window types
Section titled “Window types”A window type sets how a window is made. The Window types list opens with the tool; Close closes it. With the tool open, click a type to give it to the windows being edited. With the tool closed, a click gives it to the windows of the selected panels, and new windows use it. New adds a type; beside each type, ✎ edits it, ⧉ makes a copy and ✕ deletes it. Window types are saved on this computer.
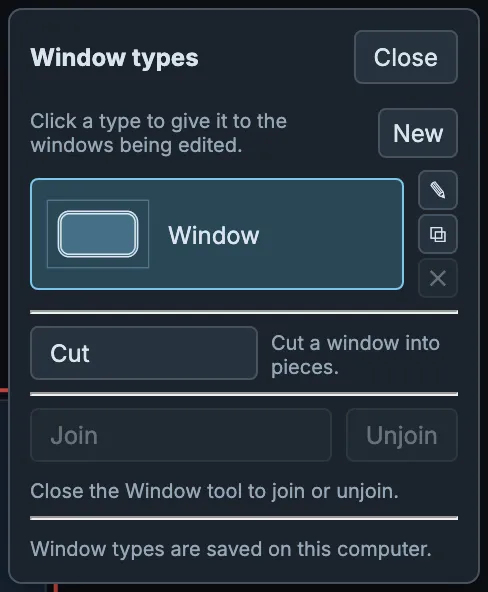
| Field | What it sets | The type Window |
|---|---|---|
| Name | The type’s name in the list. | Window |
| Lines | Which lines are marked: the Outer line, the pen line where the glass overlaps the fabric, the Inner line, or both. The notches stay either way. | both |
| Glass allowance mm | How far out from the opening the outer line, and the glass’s edge, lie. | 15 |
| Glass edge offset mm | How far beyond the outer line the glass piece is cut; a negative value cuts it inside. The line and the notches on the panel stay. | 0 |
| Inner offset mm | Where the inner line lies from the opening. Only with an inner line. | 0 |
| Inner line | Pen line, or Perforated cut with its Dash mm and Gap mm. | Pen line |
| Notch count, Notch length mm | The notches that line the glass up with the opening. | 4, 4 |
| Glass notches | Whether the glass’s notches are Pen marks or Cut. | Pen |
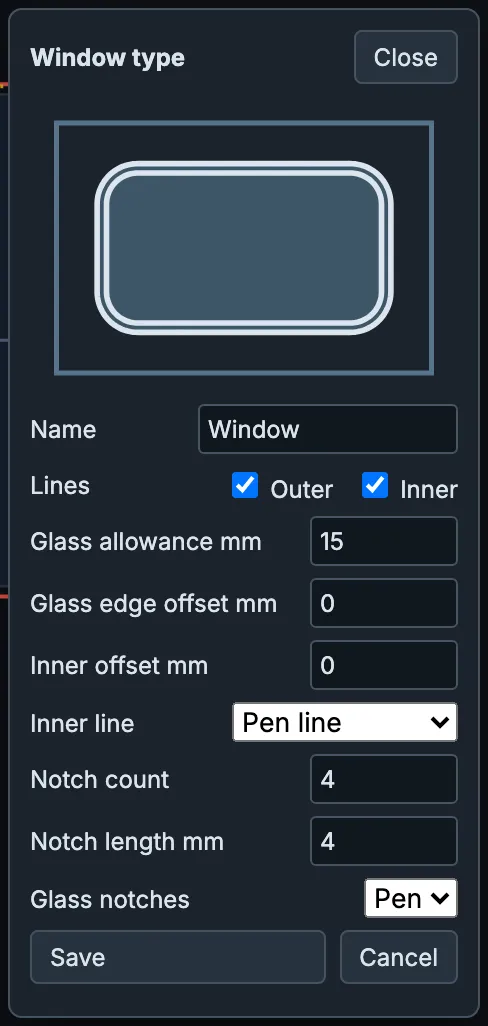
A type with dimensions that cannot be built is not saved; the editor says
WINDOW_PROFILE_INVALID: Check the type dimensions.
To give one glass its own type, close the tool, right-click the glass and choose Window type. Windows joined to that glass get the type too.
Cut, Join and Unjoin
Section titled “Cut, Join and Unjoin”The Window types list also holds:
- Cut, only while the Window tool is open: click where the cut starts, then where it ends, across a window. The window becomes two pieces, each stopping 25 mm short of the line.
- Join, only with the tool closed: joins the windows of the selected panels into one clear across their seams. Windows that are not joined are cut separately.
- Unjoin, only with the tool closed: separates them again.
The glass
Section titled “The glass”The glass is placed beside its panel. Move it, flip it and give it a material like any piece; it nests on its own, in the window’s material. Alt+drag a glass for an extra glass with no extra opening. To remove a window, select its glass and press Delete.
In Rhino
Section titled “In Rhino”- The solved 3D preview has the opening cut out of it, and Output 3D
Model fills it with tinted glass on the layer
Render::Window. - Each window’s outline is also a closed curve on the layer
Fabricator::Details::Window. Fabricator keeps those curves up to date: an edit to one is put back and a deleted one comes back. Copy one to use it yourself; the copy is yours. - Output 2D patterns draws the window outlines on the Windows output layer.